Alright, after talking to the guy at radio shack when I went back to buy some turn knobs I now understand the philosophy behind this entire project. With that, I was able to accelerate with great speed and finished my box in no time at all. Had a little trouble soldering but thats only because my solder gun sucks terribly...
Anyway, here are the pictures, I shrunk them to 1280x960 so hopefully they aren't too large. Enjoy

|
|
|
|
|
|
|
|
|
|
|
|
|
|
|
|
|
|
|
|
|
|
|
|
|
|
|
|
|
|
|
|
|
The workstation, before I began

you can see the box on the lower left corner of the pic, I forgot to take a picture of the box alone before anything went inside it.
http://www.blacksheep8th.com/JJR%20004.jpgthe mounting of the board, I used 4 very tiny screws and secured it to the bottom block inside the box. The block was meant to raise the chip to the correct height so I could make the hole to connect the wire.
http://www.blacksheep8th.com/JJR%20002.jpghttp://www.blacksheep8th.com/JJR%20001.jpgThe lid with the pre-aligned holes drilled
http://www.blacksheep8th.com/JJR%20005.jpgThe lid after the potentiometers were added. Radio Shack was out of the smaller potentiometers with the smaller shafts so I got stuck with these - no problem tho, look further down to see my solution.
http://www.blacksheep8th.com/JJR%20006.jpgThe alignment of the three buttons I added, I realized that adding the full 12 was a bit unrealistic at this point, although I might add more in the future.
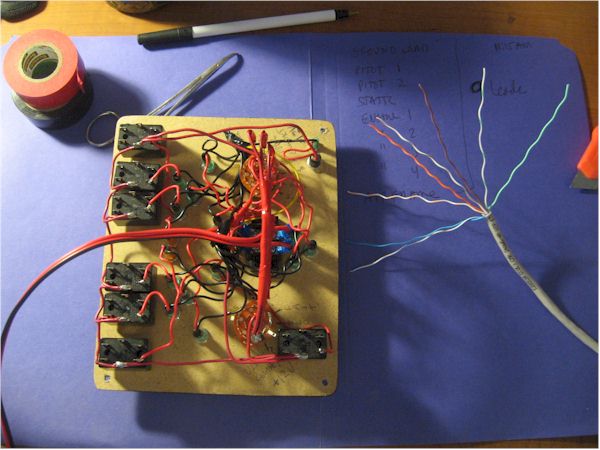
http://www.blacksheep8th.com/JJR%20008.jpgThe wonderful mess of wires inside the box before sealing her up. Aint it beautiful?
http://www.blacksheep8th.com/JJR%20007.jpgThe box, finished and sealed with the famous Hot Glue Gun, I did this so it would be easy to take the cover off in the future in case I want to add something to it. My solution for the tall potentiometers was to take a hack saw and saw them off just slightly higher than my knobs, after that the knobs mounted rather easily.
http://www.blacksheep8th.com/JJR%20009.jpgLinked images changed to URLs -jcbI think I did fairly well for my first build. It only took me two days to put it together so thats not bad. I soldered all points together and then used the hot glue gun to add a protective layer on them to keep them from accidentally touching inside the box. All points have been volt tested to assure all points are getting the voltage required. The other thing I might add is the hole that I put in the front of my box for my cord was perfect - the cool thing is, the wood I used was just thick enough to provide just the right amount of space between the board inside the box and it connects snuggly, this will keep anything from pulling down from the weight of the cord so it turned out nicely. The wood I chose was some old trim board we had laying around our house, actually the finish on the board was rather nice, although with the addition of my brownish wood glue to hold it together it kind of ruined the effect.
Oh well its not like it has to look all that pretty, as long as it does its job correctly

Thank you one and all for the help and assistance, it was much appreciated and I would not have gotten through this on my own.
S~ To everyone.


 Intel i7 960 quad 3.2G LGA 1366, Asus P6X58D Premium, 750W Corsair, 6 gig 1600 DDR3, Spinpoint 1TB 720
 you can see the box on the lower left corner of the pic, I forgot to take a picture of the box alone before anything went inside it.

