Balsa EZ Part 3: Engine cowl

Your Aviation (or Personal) Photos and discussion on Cameras & photography.

Balsa EZ Part 3: Engine cowl

Postby TacitBlue » Wed Nov 16, 2005 12:00 am

Construction continues. The engine cowl took a lot longer than I thought it would because of the complicated shape.

The construction process was basically the same as the fuselage, so I started photographing here. At this point it's ready to have the stringers attached at the corners.
Image

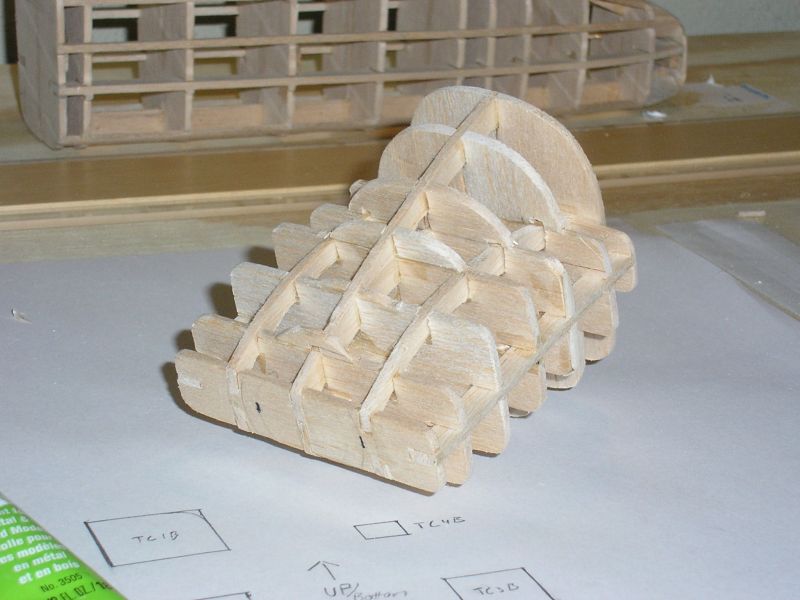
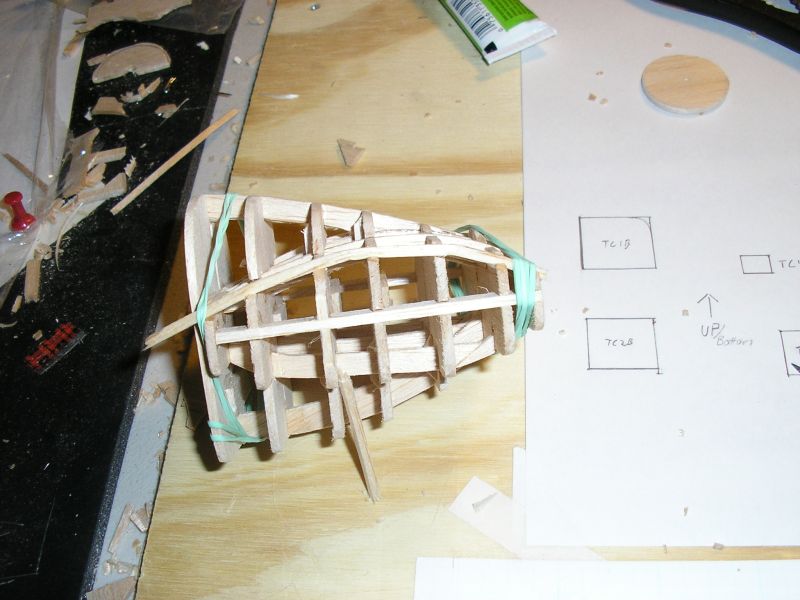
This is done by soaking them in warm water and then bending them into place and holding them down with rubber bands while the glue dryes. for sharper corners, I tryed steaming the wood and managed to bend them a little better.
Image

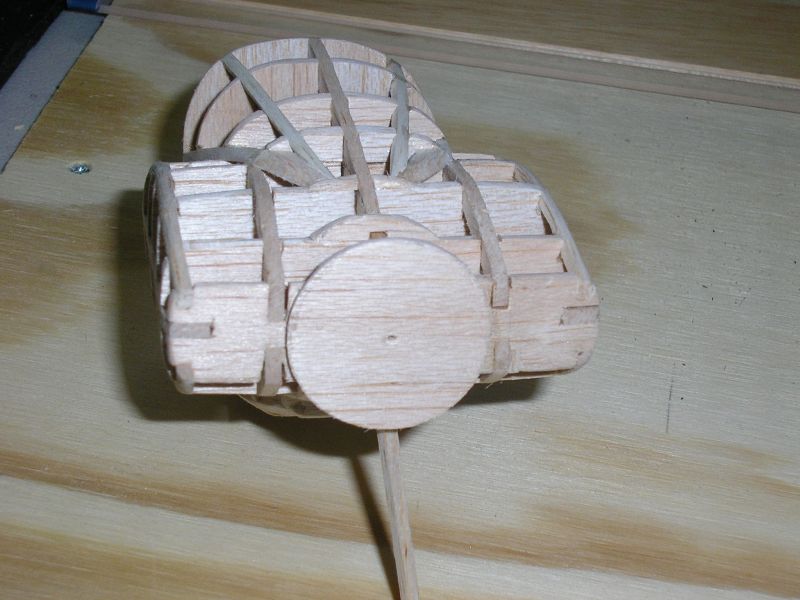
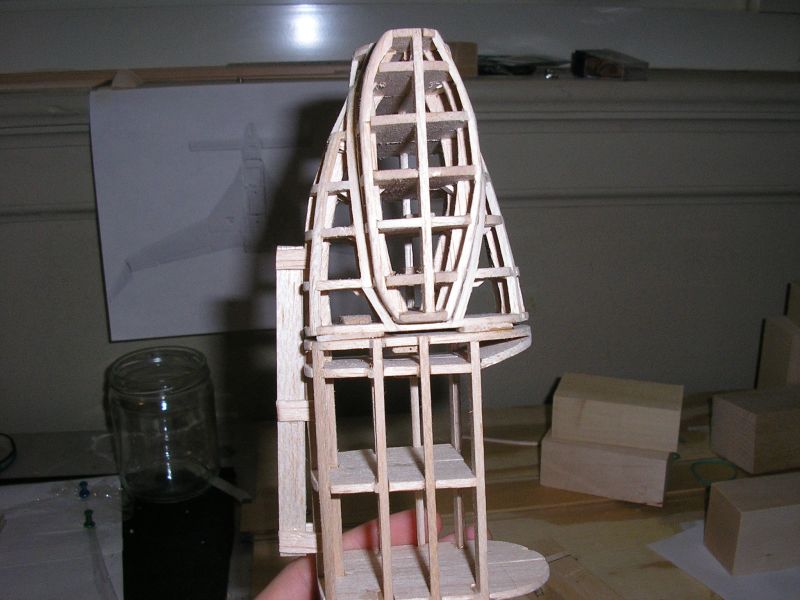
Here, all of the main striners are attached, and everything is sanded down. I just need a few more to hold the shape around that circular piece in the back.
Image

After the cowl was finished, I put it up against the back of the fuselage and found that the area to be glued together was crooked, so I shimmed it with some thin pieces of balsa...
Image

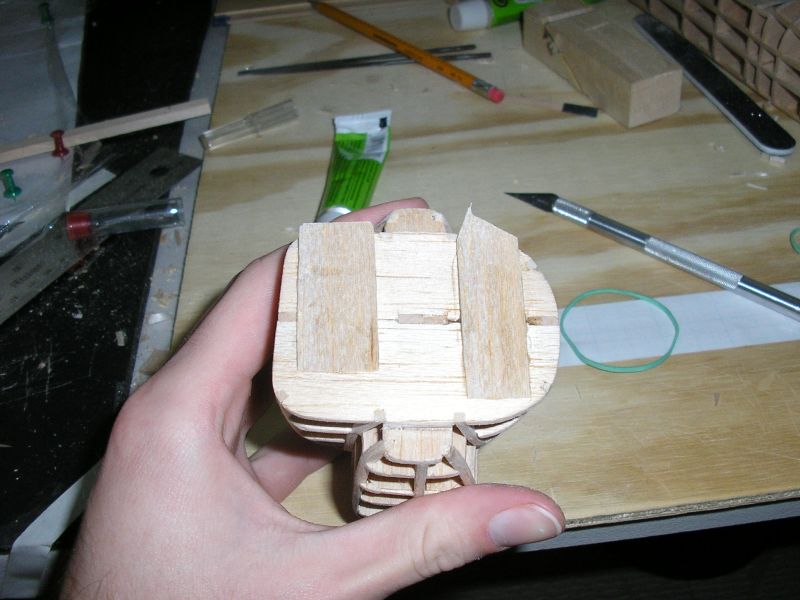
...and used a jig to hold everything straight while the glue dryed.
Image

And this is where I am now. As you can see I also have the left wing almost completed. I will document the construction of the other wing now that I am sure I have been doing it correctly. ;)
Image

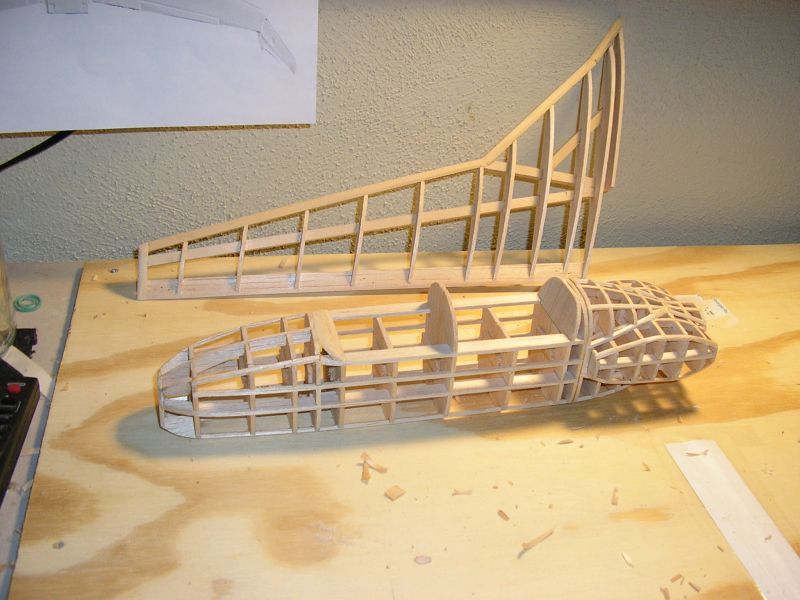
It's a good thing that this craft isn't going to actually fly, but I guess if it was, then I would have made the engine cowl differently anyway. I guess my next update will be the right wing, and then after that the canard, tails/winglets, and finishing. I still haven't decided how, or even if I want to cover it when it's done. I might cover half of it to the centerline, so that the frame-work is still visible on one side when it's displayed.
Last edited by TacitBlue on Wed Nov 16, 2005 12:04 am, edited 1 time in total.
Image
A&P Mechanic, Rankin Aircraft 78Y

Aircraft are naturally beautiful because form follows function. -TB
User avatar
TacitBlue
Major
Major
 
Posts: 3856
Joined: Mon Nov 08, 2004 12:33 pm
Location: Saint Joseph, Missouri, USA

Re: Balsa EZ Part 3: Engine cowl

Postby ozzy72 » Wed Nov 16, 2005 2:15 am

That is coming along really nicely Tacit ;)
Image
There are two types of aeroplane, Spitfires and everything else that wishes it was a Spitfire!
User avatar
ozzy72
Administrator
Administrator
 
Posts: 33284
Joined: Fri May 24, 2002 4:45 am
Location: Madsville

Re: Balsa EZ Part 3: Engine cowl

Postby Jakemaster » Wed Nov 16, 2005 7:59 am

wow!  you are really good at this!  Cant wait to see the finished product!
Jakemaster
 

Re: Balsa EZ Part 3: Engine cowl

Postby igs942 » Wed Nov 16, 2005 8:09 am

Looking really good there Tacit. I would love to be able to make something like that but I haven't got the skill (or patience).
Whats your next project... 1:1 Mossie??? ;D
Last edited by igs942 on Wed Nov 16, 2005 8:09 am, edited 1 time in total.
User avatar
igs942
Captain
Captain
 
Posts: 792
Joined: Tue Dec 28, 2004 1:28 pm
Location: Oxford, UK

Re: Balsa EZ Part 3: Engine cowl

Postby Rifleman » Wed Nov 16, 2005 11:16 am

Nice work so far........for a static model, its gonna be fine........ 8)

If it was going to fly, you'd have to start trimming away at least half of all that timber.......it looks quite robust .  :-X

;D
Image
User avatar
Rifleman
Lieutenant Colonel
Lieutenant Colonel
 
Posts: 5684
Joined: Sat Oct 12, 2002 4:44 pm
Location: Tropical island in the Pacific

Re: Balsa EZ Part 3: Engine cowl

Postby Threadkiller » Wed Nov 16, 2005 6:54 pm

looking good!

one sugestion for when ur covering her.... if u get white semi-translucid tissue paper (the kind that comes included in most guillow's kits) and use a solution of water and glue (1:3) and with a spray the kind used to spray plants with, u can cover THE WHOLE MODEL and when the tissue dries and stiffens it becomes translucid, so the structure is visible and best of all, protected by the paper. i did that with my Supercub model and looks awesome!


great model man ;)


P.S. seems to me that you have a LOT of time in your hands.... eh? ::) 8) :D
Image
User avatar
Threadkiller
Major
Major
 
Posts: 2287
Joined: Tue May 07, 2002 3:11 pm
Location: London, Ontario

Re: Balsa EZ Part 3: Engine cowl

Postby TacitBlue » Thu Nov 17, 2005 1:25 am

Thanks for the tips. I usually use a glue/water solution when covering with tissue, but I just brush it on. I hadn't thought about spraying it.
Image
A&P Mechanic, Rankin Aircraft 78Y

Aircraft are naturally beautiful because form follows function. -TB
User avatar
TacitBlue
Major
Major
 
Posts: 3856
Joined: Mon Nov 08, 2004 12:33 pm
Location: Saint Joseph, Missouri, USA

Re: Balsa EZ Part 3: Engine cowl

Postby H » Thu Nov 17, 2005 2:49 am

I was reeady to PM an inquiry about your progress; looks like it's getting there. Considering the amount of framework, as you said, it's a good thing this is a static model. :P
H
Lieutenant Colonel
Lieutenant Colonel
 
Posts: 5525
Joined: Fri May 27, 2005 1:27 am
Location: NH, USA


Return to Photos & Cameras

Who is online

Users browsing this forum: No registered users and 114 guests