Tranquility

Let loose your artistic flair! No Rules except please keep shots within 380K & 2000 pixels wide.

Tranquility

Postby 9thSimplex » Sat Jan 06, 2007 9:15 pm

Hello gentlemen,

I experimented with the subject of "creating moody light" and even got some results that are, imho, worth showing.

This one gave the title to this discussion and i think it hits the nail.. A lonely Beaver whose pilot is enjoying the last warm sunbeams of a fall's evening:
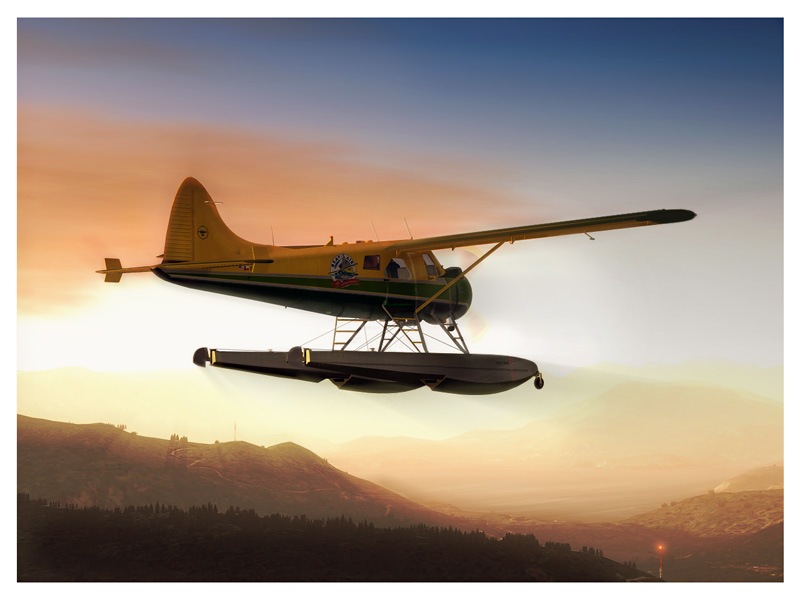
Image

You can find a larger version here (ImageShack)

And a 2nd one from the same flight, Canadian Evening Mood.. Mountains, Water and a setting sun
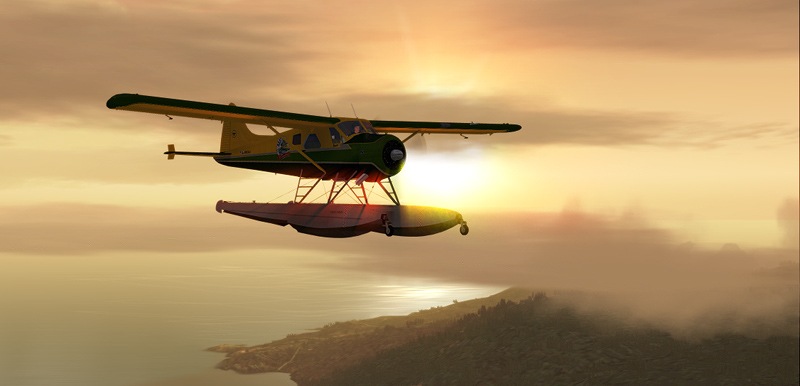
Image

The 3rd was taken at almsot the same place, jsut a bit south. You can sea the city of Vancouver in the back while this FedEx freighter turns away from Vancouver Intl.
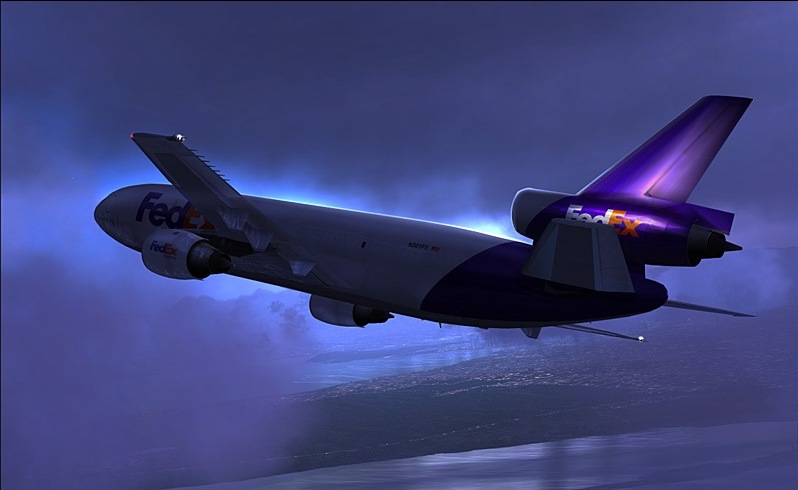
Image

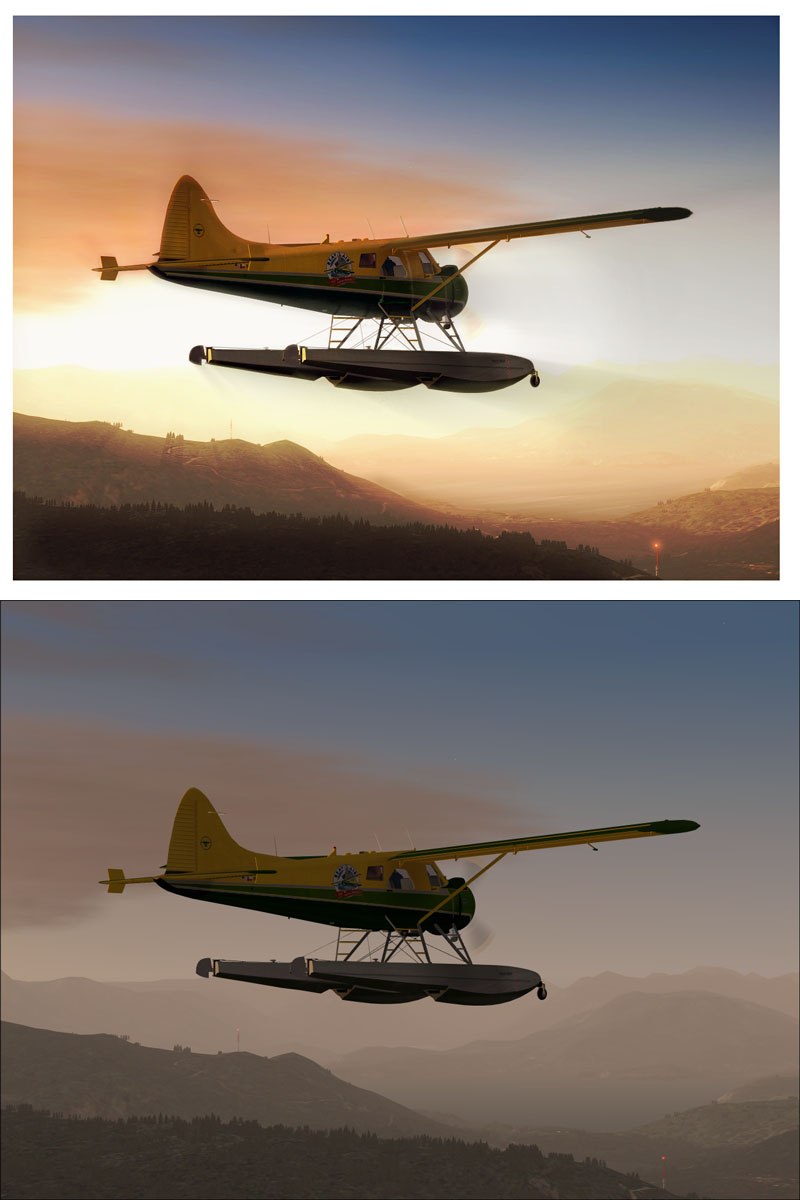
All these shots have been created by basically applying almost the same technique... duplicate the image layer and set the blending mode of the top one to "color dodge". Then play with opacity and erase here and there.. voila, very intense lights.

For comparison just check this image, i placed the final version and the original jsut below each other:
Image

btw.. Recently I was following a nasty discussion because of "compression ruined ..." phrase.. I don'T think you find obvious compression artifacts in the above shots although all are well below 100kB (not the comparison one, i chose a high compression there to stay below 100k but that'S ok as it is pretty large). For similar results I recommend using Irfanview, save as jpg with a compression of 93-95 should give you clean results and handy file sizes.

I hope I haven'T bored you with this post,

cheers gentlemen

Simplex
If you like screenshots you might check
Image
User avatar
9thSimplex
2nd Lieutenant
2nd Lieutenant
 
Posts: 154
Joined: Wed Dec 21, 2005 10:50 pm
Location: Eurospeedway Lausitzring, GER

Re: Tranquility

Postby Immelman » Sat Jan 06, 2007 9:22 pm

All of them are really great, but the Fedex one is amazing.  Those colors!  Very very cool.  I dont think that i, personally, have ever seen an edit like this.
User avatar
Immelman
1st Lieutenant
1st Lieutenant
 
Posts: 409
Joined: Sat Jun 03, 2006 7:37 pm

Re: Tranquility

Postby Sytse » Sat Jan 06, 2007 10:22 pm

Nothing boring here m8! :)
Last edited by Sytse on Sat Jan 06, 2007 10:22 pm, edited 1 time in total.
User avatar
Sytse
Major
Major
 
Posts: 3397
Joined: Fri Jun 24, 2005 5:26 am
Location: The Netherlands

Re: Tranquility

Postby EGNX » Sun Jan 07, 2007 5:44 am

Wow! The Fed Ex one! Thats just amazing! :o
Anychance of linking to a larger version!?  ::) ;)
Image
User avatar
EGNX
Major
Major
 
Posts: 1431
Joined: Thu Jul 14, 2005 3:49 pm
Location: Leicester, England

Re: Tranquility

Postby Hai Perso Coyone? » Sun Jan 07, 2007 7:34 am

WOW! The first one is amazing...The Fed-Ex one is brilliant too :o :o
User avatar
Hai Perso Coyone?
Ground hog
Ground hog
 
Posts: 0
Joined: Fri Jan 12, 2007 7:31 pm
Location: Rome, Italy

Re: Tranquility

Postby 9thSimplex » Sun Jan 07, 2007 8:29 am

[quote]Wow! The Fed Ex one! Thats just amazing! :o
Anychance of linking to a larger version!?
If you like screenshots you might check
Image
User avatar
9thSimplex
2nd Lieutenant
2nd Lieutenant
 
Posts: 154
Joined: Wed Dec 21, 2005 10:50 pm
Location: Eurospeedway Lausitzring, GER

Re: Tranquility

Postby Jared » Sun Jan 07, 2007 10:48 am

I love those edits, very peaceful :)
User avatar
Jared
Lieutenant Colonel
Lieutenant Colonel
 
Posts: 9976
Joined: Sun Jul 13, 2003 11:18 am
Location: Uniontown, Ohio

Re: Tranquility

Postby Splat762 » Sun Jan 07, 2007 1:02 pm

Stunning edits....they look like artwork!!!  ;D
Naval Aviation - Fight to fly, fly to fight, fight to win.

Image
Sig by Stormtropper/9thSimplex


[center]Aviation Ordnancema
User avatar
Splat762
Captain
Captain
 
Posts: 745
Joined: Sat Nov 19, 2005 9:47 pm
Location: NAS Whidbey Island, WA. USA

Re: Tranquility

Postby cspyro21 » Sun Jan 07, 2007 1:58 pm

I'd love that second pic framed and hanging on my wall  :o :o
User avatar
cspyro21
Major
Major
 
Posts: 4987
Joined: Sun Aug 28, 2005 6:11 am

Re: Tranquility

Postby FSGT Gabe » Sun Jan 07, 2007 3:38 pm

The second is so real and the lighting in the FedEx one :o :o :o!  Wonderful!  I'd like them hanging on my wall too!

Great work!

- Kevin ;D
Image
Studio V - Your destination for all your screenshot needs...
[move][color=#000066]Wi
User avatar
FSGT Gabe
Major
Major
 
Posts: 1576
Joined: Tue May 16, 2006 10:44 am
Location: Home airport: CYOO

Re: Tranquility

Postby DizZa » Mon Jan 08, 2007 7:43 am

Wow, they're all amazing! How did you do the FedEx MD-11 one?
DizZa
 

Re: Tranquility

Postby 9thSimplex » Mon Jan 08, 2007 8:47 am

Thank you!

The FedEx one was the easiest. I took the original screenie, opened it in PS and dublicated the layer. Then I set the top layer to the blending mode "color Dodge" and changed it's opacity to a pleasing value. Then I put a path along the top borders of the MD11 and filled tha path contour with color dodge set to "highlights" and a high value and repeated it a couple of times. voila. The water are only some dodge streaks and motion blur of the water surfaces only afterwards, giving a soft but highlighted surface.

that's it... all in all like 15 minutes.
If you like screenshots you might check
Image
User avatar
9thSimplex
2nd Lieutenant
2nd Lieutenant
 
Posts: 154
Joined: Wed Dec 21, 2005 10:50 pm
Location: Eurospeedway Lausitzring, GER

Re: Tranquility

Postby F3Hadlow » Mon Jan 08, 2007 10:46 am

The FedEx pic has wonderful colours :)
F3Hadlow
 

Re: Tranquility

Postby DizZa » Mon Jan 08, 2007 11:20 am

I'm a photoshop noob. What do you mean by "path"?

Thanks
DizZa
 

Re: Tranquility

Postby 9thSimplex » Mon Jan 08, 2007 12:17 pm

oh, no problem...

a path can be set up with the pen tool. I'm using paths for cutting out objects as well as they allow a VERY precise work.
Click on the pen in the PS toolbox. If you click on your image now you'll see small squared dots appearing where you click. They are connected by lines. This is the path. The lines can also be curved (hold ALT+left mouse when clicking a dot and move the appearing handle) to fit any shape. Requires some practise but it's really a mighty tool. However, place the lines along the area as you need it then right click and chose "fill contour" or whatever it's called in the english PS version.

You might want to check the Screenshotprints.com screenshot tips forum for some in depth tutorials on paths and bezier curves. Hope this plug is allowed gentlemen.
If you like screenshots you might check
Image
User avatar
9thSimplex
2nd Lieutenant
2nd Lieutenant
 
Posts: 154
Joined: Wed Dec 21, 2005 10:50 pm
Location: Eurospeedway Lausitzring, GER

Next

Return to Edited Screenshots

Who is online

Users browsing this forum: No registered users and 547 guests