ILS Landing Tutorial with Screenshots

Forum dedicated to Microsoft FS2004 - "A Century of Flight".

Re: ILS Landing Tutorial with Screenshots

Postby Jakemaster » Wed Jul 05, 2006 7:59 pm
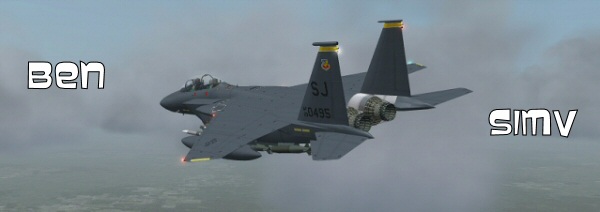
Simply put, you look up the ILS frequency on the map.  Open your radiostack and tune NAV1 to that frequency.  Turn on the AP to approach mode, and it will fly the ILS
Jakemaster
 

Re: ILS Landing Tutorial with Screenshots

Postby Ben R » Wed Jul 05, 2006 8:35 pm
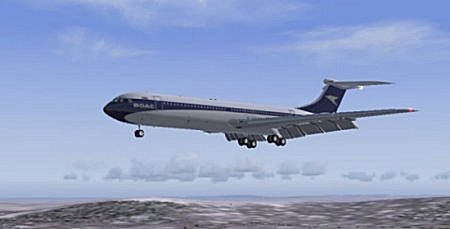
vololiberista! nav! thank you ever so much!!!!! i just did it!!!!! w000t!!!!!! i used your table and everything volo! and nav..i didnt know where some intruments was..i looked at ur screenies..thank you sooooooo much!!


flying is sooooo much fun! ;D
Image
User avatar
Ben R
Major
Major
 
Posts: 1135
Joined: Wed Jul 05, 2006 3:51 am
Location: ipswich

Re: ILS Landing Tutorial with Screenshots

Postby Ben R » Wed Jul 05, 2006 11:00 pm

also volo..where'd ya get that diagram for heathrow? i would like to start going to more place than heathrow =)
Image
User avatar
Ben R
Major
Major
 
Posts: 1135
Joined: Wed Jul 05, 2006 3:51 am
Location: ipswich

Re: ILS Landing Tutorial with Screenshots

Postby vololiberista » Thu Jul 06, 2006 12:43 am

also volo..where'd ya get that diagram for heathrow? i would like to start going to more place than heathrow =)


That approach plate is my own one.. I have the full set of SIDS STARS parking, airport charts etc etc.
For other airports one can easily find most on the net.  Quite a lot of sim sites have a facility to download them  Simrader, Vatsim and Google of course. Frequently if you apgrade scenery for a particular airport and region charts will be included in the download.  If you fly in Italy then the ISD Project is stunning.
Boun voli,
Vololiberista
Andiamo in Italia
Image
User avatar
vololiberista
Major
Major
 
Posts: 1042
Joined: Thu Feb 16, 2006 5:43 pm

Re: ILS Landing Tutorial with Screenshots

Postby Ben R » Thu Jul 06, 2006 12:46 am

cool man..it was great man..love flying now =)
Image
User avatar
Ben R
Major
Major
 
Posts: 1135
Joined: Wed Jul 05, 2006 3:51 am
Location: ipswich

Re: ILS Landing Tutorial with Screenshots

Postby alert5 » Fri Jul 07, 2006 6:56 am

Hiya Nav,

Great tutorial, almost mastered ILS landings except I find the approach speed difficult to control (more practise, that's all!)

Just a quick question, I noticed that the APP and HDG are set early on in your tute.  Could this be done soon after departure, and would the AP line up at the correct point to intercept the glidescope despite the HDG setting?  If for example, I've got the HDG set to fly directly over the destination airport and runway, would the AP work out by using the APP heading that it'd have to approach the HDG at a different angle to intercept the ILS glidescope at the right alt and speed?
Image
User avatar
alert5
Ground hog
Ground hog
 
Posts: 6
Joined: Tue Jun 27, 2006 8:09 am

Re: ILS Landing Tutorial with Screenshots

Postby Nexus » Fri Jul 07, 2006 7:24 am

Alert, that wont cut it.
You need to intercept the LLZ at least 7-8nm out, level flight.

Think the ILS as a standard VOR but with only 2 radials (front and backcourse), your flight path has to cross the front course or else the signal wont be picked up by the AP.

You have to guide the aircraft to the proper intercept angle, and then the AP is able to track the LLZ.

Mods, what do you think of making this thread a sticky?
Seems like every week we get posters asking about ILS  :)
Nexus
Major
Major
 
Posts: 3240
Joined: Fri Jul 18, 2003 4:18 pm

Re: ILS Landing Tutorial with Screenshots

Postby Nav » Fri Jul 07, 2006 7:31 am

Hi alert5, welcome!

No, the tute only covers the landing phase, not the whole flight and approach. Also, ILS systems only have a range of about 30 miles.

Basically you should only start preparing for landing (and setting up the ILS) about thirty miles out, once the tower has told you which runway to use.

Tricky at first - but if you click the Map View on and enlarge it, you'll be able to see the runway layout and your position relative to it. Plot a course that will bring you in at an angle of about thirty degrees to the runway line, at say 15 miles out from the airport.

Then set the ILS frequency, and set the arrow on the 'VOR1' gauge to the runway heading. If you look at the first screenshot you'll see how it should look - the white arrow is the runway line, the shorter magenta line is the line of the runway. You can see that I'm approaching at about a 40-degree angle. Then press 'APP' and the autopilot will line you up from there (AND cancel the 'Heading Hold' for you at the right moment).

Sounds complicated, but after a bit of practice you get so you can use the gauge as a 'map'. Early on, it's not a bad idea actually to sketch things out on a bit of paper, if you're not sure of things.

Make sure, too, that you're well below the glideslope as you close in; the ILS won't capture the glideslope unless you're below it. 2,500 feet at not less than 15 miles out is a good start.

As for speed, the golden rule is to slow down early. And approach level -
Last edited by Nav on Fri Jul 07, 2006 7:43 am, edited 1 time in total.
Nav
Captain
Captain
 
Posts: 717
Joined: Thu Sep 30, 2004 11:29 pm

Re: ILS Landing Tutorial with Screenshots

Postby alert5 » Fri Jul 07, 2006 7:44 am

Hi Nav,

Firstly, thanks very much for the tute, your reply and the welcome!

That's very interesting that the ILS systems have the 30 mile or so range.
Last edited by alert5 on Fri Jul 07, 2006 7:44 am, edited 1 time in total.
Image
User avatar
alert5
Ground hog
Ground hog
 
Posts: 6
Joined: Tue Jun 27, 2006 8:09 am

Re: ILS Landing Tutorial with Screenshots

Postby Nexus » Fri Jul 07, 2006 7:48 am

Sorry to be picky...but it's glide SLOPE...it's a vertical guidance of the ILS system

You seem to confuse it with LOCALIZER which is the lateral guidance signal.

IRL, most pilots lets the AP intercept the localizer and glideslope, granted in real life, it's much more smoother.
Nexus
Major
Major
 
Posts: 3240
Joined: Fri Jul 18, 2003 4:18 pm

Re: ILS Landing Tutorial with Screenshots

Postby Nav » Fri Jul 07, 2006 7:51 am

Pleasure, alert5.
Last edited by Nav on Fri Jul 07, 2006 8:03 am, edited 1 time in total.
Nav
Captain
Captain
 
Posts: 717
Joined: Thu Sep 30, 2004 11:29 pm

Re: ILS Landing Tutorial with Screenshots

Postby alert5 » Fri Jul 07, 2006 8:00 am

I tend to let George do the work until I'm close


;D Excellent, you've named your AP! ;D

Perhaps I should be a little more forgiving with the AP lining up to the glidescope then.  Just that I'm really tense at this stage trying to remember everything and the AP is swaying like it's having a slow dance with it's glidescope girlfriend.
Image
User avatar
alert5
Ground hog
Ground hog
 
Posts: 6
Joined: Tue Jun 27, 2006 8:09 am

Re: ILS Landing Tutorial with Screenshots

Postby Nav » Fri Jul 07, 2006 8:13 am

The A/P probably says the same sort of thing about YOUR flying, alert5. :)

On 'auto v. manual', assuming that you're fairly new to FS, I think there are three phases. At first, you'll NEED the auto aids. Try to work up from there to the point where you can do everything the autopilot can do, if need be. Then you can sink back into laziness (like me) and use George to do everything except make the coffee for you! :)
Last edited by Nav on Fri Jul 07, 2006 8:15 am, edited 1 time in total.
Nav
Captain
Captain
 
Posts: 717
Joined: Thu Sep 30, 2004 11:29 pm

Re: ILS Landing Tutorial with Screenshots

Postby alert5 » Fri Jul 07, 2006 8:36 am

>>The A/P probably says the same sort of thing about YOUR flying, alert5.

;D Very good!  Sometimes it switches itself on automatically because it feels airsick when i fly manually.

I try and not to fly manually at all if i can help it.  i feel it's more realistic.  i can't imagine commercial airline pilots flying most of the trip manually.
Image
User avatar
alert5
Ground hog
Ground hog
 
Posts: 6
Joined: Tue Jun 27, 2006 8:09 am

Re: ILS Landing Tutorial with Screenshots

Postby Nav » Sat Jul 08, 2006 12:07 am

alert5, about 'glidescope', poor Nexus will be grinding his teeth!

An ILS consists of TWO radio beams. The first, the 'localiser', is a horizontal directional beam (like a VOR) which lines you up. The second - the glides-L-ope', with an 'L' :) - is aligned vertically and guides you down to the runway at the correct rate of descent.

About flying manual, commercial pilots like to do as much of it as they can, to stay in practice. Most of them fly the climb out after takeoff manually most of the way to height, for example. But when it comes to landing (depending on how well the airport they're flying to is equipped) they are normally REQUIRED by company and air safety regulations to use the auto systems. I believe that they have to apply for special permission to practise landing manually, and only usually get it a couple of times a month.

Makes entire sense for them to stay in practice really. How would you like to be a passenger on an aircraft where the automatic systems broke down - and find out (the hard way) that the 'Pilot Flying' hadn't actually landed an airliner by hand for the last five years or so? :)

Generally, if I were you, I'd persevere with 'manual' until you're good at it. You'll get a lot more fun out of FS that way, in the long run; and you'll be able to fly the historical types and any sort of download as well as the 'full auto' default types. AND land at airports which don't have ILS.
Last edited by Nav on Sat Jul 08, 2006 12:15 am, edited 1 time in total.
Nav
Captain
Captain
 
Posts: 717
Joined: Thu Sep 30, 2004 11:29 pm

PreviousNext

Return to FS 2004 - A Century of Flight

Who is online

Users browsing this forum: No registered users and 293 guests