Install instructions?

A great entry on the design ladder, repainting can be rewarding & fun! Learn how here! (Not for repaint requests)

Install instructions?

Postby DanielF » Sat Mar 15, 2003 9:43 pm

I'm about to upload a repaint for the first time, but I'm not sure how I should write the installation instructions.  I've done some research by downloading other repaints and looking at their instructions.  Here's what I came up with.  Is there anything I should change or is this good?  ???  (btw, it's a repaint of the 182rg to look like the one from FS98  ;D)

1.  In the folder "...aircraft\c182rg" create a new folder called 'texture.fs98'.
2.  Extract the two texture files into the texture.fs98 folder.
3.  Copy the information below and paste it in the aircraft.cfg file.  If this is not the first repaint you've downloaded of this plane, replace the number 1 in [fltsim.1] and paint1 with the next number (2, 3, etc.):

[fltsim.1]
title=Cessna Skylane 182R RG Paint1
sim=Cessna182RRG
model=
panel=
sound=
texture=fs98
kb_checklists=Cessna182RRG_check
kb_reference=Cessna182RRG_ref
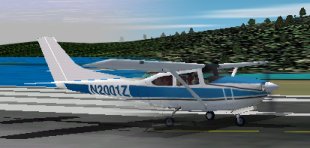
atc_id=N2001Z
ui_manufacturer=Cessna
ui_type=C182RG Skylane
ui_variation=White with blue
description=Like its sibling, the 182S, the RG version of this popular plane is a stable, powerful workhorse. This model, however, allows you to move up to more complex flying with retractable landing gear. Cessna no longer manufactures a retractable gear version of the 182. Flight Simulator's 182RG is based on earlier models last built in the 1980s. See the Aircraft Information section of Help for tips on flying this aircraft.
Image
FS Evolution

DanielF
User avatar
DanielF
1st Lieutenant
1st Lieutenant
 
Posts: 484
Joined: Fri Jul 26, 2002 12:29 pm
Location: Virigina, USA

Re: Install instructions?

Postby Hagar » Sun Mar 16, 2003 2:38 am

Your instructions look clear enough. I'm sure everyone has their own pet method for adding repainted textures to existing aircraft. Anyone who has done this before will have no problems.

I think this is how I would do it. Include your dummy Aircraft.cfg entry in the Readme, as in your example. I would name the header [fltsim.x]
The install instructions are then as simple as possible.

1. First copy/paste the existing c182rg texture folder. Rename the copy to texture.fs98.
2. Paste the 2 included textures into the new texture.fs98 folder overwriting existing files.
3. Open Aircraft.cfg in Notepad & copy/paste this new [fltsim.x] entry below existing entries.
4. Change x to the next number in sequence. Exit Notepad saving changes.

If you're not including the other textures don't forget to cover this. Whichever method you use there will always be people who don't understand how it's done.
Last edited by Hagar on Sun Mar 16, 2003 2:54 am, edited 1 time in total.
Image

Founder & Sole Member - Grumpy's Over the Hill Club for Veteran Virtual Aviators
Member of the Fox Four Group
My Google Photos albums
My Flickr albums
User avatar
Hagar
Colonel
Colonel
 
Posts: 30862
Joined: Wed Jun 19, 2002 7:15 am
Location: Costa Geriatrica


Return to Aircraft Repainting

Who is online

Users browsing this forum: No registered users and 212 guests