Cockpit Construction Continued (Part 8)

Only for Genuine FS fanatics! Taking this hobby from Real to Surreal? Or maybe just combining 4 hobbies into 1 ;)

Cockpit Construction Continued (Part 8)

Postby JBaymore » Wed Aug 25, 2004 10:34 pm

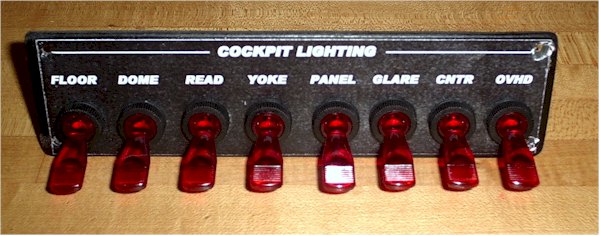
More Instrument Panel Facings

Here are some more control panel face plates for the simpit I'm building ...... as are also documented in the "Cockpit Construction Continued (Part 5) thread.
Last edited by JBaymore on Wed Aug 25, 2004 10:47 pm, edited 1 time in total.
Image ImageIntel i7 960 quad 3.2G LGA 1366, Asus P6X58D Premium, 750W Corsair, 6 gig 1600 DDR3, Spinpoint 1TB 720
User avatar
JBaymore
Global Moderator
Global Moderator
 
Posts: 10020
Joined: Sat May 24, 2003 9:15 am
Location: New Hampshire

Re: Cockpit Construction Continued (Part 8)

Postby JBaymore » Thu Aug 26, 2004 5:16 pm

Here's what one of the completed instrument panels for the simpit looks like when it is finished:
Image

The background image that I created a while ago was in the thread "Cockpit Construction Continued (Part 5)".

The switches here are all illuminated 12V dc and supply real dc to the noted lights.

This will be mounted to the background panel with large head hex screws at the four corners.

best,

...................john
Image ImageIntel i7 960 quad 3.2G LGA 1366, Asus P6X58D Premium, 750W Corsair, 6 gig 1600 DDR3, Spinpoint 1TB 720
User avatar
JBaymore
Global Moderator
Global Moderator
 
Posts: 10020
Joined: Sat May 24, 2003 9:15 am
Location: New Hampshire

Re: Cockpit Construction Continued (Part 8)

Postby SilverFox441 » Fri Aug 27, 2004 7:25 am

Nice looking switch panel.

About the Flight Deck door...

Couldn't you tie the green and yellow LED's to an aircraft condition (like airborne) and have it work on the AUTO mode that way? They would still work based on manual swicth position of course.

A little creative electronics and you could have the red LED blink if the aircraft was airborne and the switch was not in the LOCK or AUTO position. :)
Steve (Silver Fox) Daly
User avatar
SilverFox441
Major
Major
 
Posts: 1335
Joined: Sun Apr 13, 2003 12:54 am
Location: Mississauga, Ontario, Canada

Re: Cockpit Construction Continued (Part 8)

Postby Fly2e » Fri Aug 27, 2004 2:22 pm

John, you're a real nut!
Last edited by Fly2e on Fri Aug 27, 2004 2:22 pm, edited 1 time in total.
COMING SOON!
User avatar
Fly2e
Colonel
Colonel
 
Posts: 198020
Joined: Thu Jan 17, 2002 5:29 pm
Location: KFRG

Re: Cockpit Construction Continued (Part 8)

Postby alrot » Sat Aug 28, 2004 4:00 pm

that is getting shape,beutifull swich panel jonh
Image

Venezuela
User avatar
alrot
Lieutenant Colonel
Lieutenant Colonel
 
Posts: 8961
Joined: Wed Oct 08, 2003 10:47 am

Re: Cockpit Construction Continued (Part 8)

Postby JBaymore » Sat Aug 28, 2004 6:10 pm

Center Pedestal Layout Taking Shape

I am getting more of the center pedestal instrument panel facings done..... and can really start to see what the center pedestal is going to look like now.

On the left of the throttle in the "bay" next to the pilot seat are two of the eventual four real Goflight 166 radios and also a RP-8 switch module.
Last edited by JBaymore on Sat Aug 28, 2004 6:25 pm, edited 1 time in total.
Image ImageIntel i7 960 quad 3.2G LGA 1366, Asus P6X58D Premium, 750W Corsair, 6 gig 1600 DDR3, Spinpoint 1TB 720
User avatar
JBaymore
Global Moderator
Global Moderator
 
Posts: 10020
Joined: Sat May 24, 2003 9:15 am
Location: New Hampshire

Re: Cockpit Construction Continued (Part 8)

Postby SilverFox441 » Sun Aug 29, 2004 2:53 am

That'll work, "AND" the UNLOCK and the Gear Handle together...output goes to the red flasher LED.
Steve (Silver Fox) Daly
User avatar
SilverFox441
Major
Major
 
Posts: 1335
Joined: Sun Apr 13, 2003 12:54 am
Location: Mississauga, Ontario, Canada

Re: Cockpit Construction Continued (Part 8)

Postby chuckcrc » Sun Aug 29, 2004 6:13 am

Hi John
great work on those panels. They're a real professional job and finish. I think that doing the face panels first is the way to go because you can see how everything fits together and you can use them as a template to drill the metal work for the contol/switches .

I did mine the other way around and I now having a bit of a struggle to get the graphics to look good. I've ended up using Lettraset which is hard to apply and get straight. Your method is the way to go. Did that graphics software cost much?

cheers
chuck
chuckcrc
2nd Lieutenant
2nd Lieutenant
 
Posts: 163
Joined: Sun Apr 04, 2004 9:11 am
Location: Australia

Re: Cockpit Construction Continued (Part 8)

Postby JBaymore » Mon Aug 30, 2004 12:04 am

chuck,

Thanks for the kind words.

The program I am using for the panles is called Serif Draw Plus.  It came as part of the Serif Publishing Suite..... with the main program being a Pagemaker clone called PagePlus.  It also has PhotoPlus and some other stuff.   They all will output many broadly compatible file formats... including pdf files.  

The draw program is VERY easy to use.  The panel facings are a real snap to make.  I have "blanks" stored so I just open the basic size I need... and add lettering and lines.

And for some "test" ones, I will output the program to a pdf file on a CD...... and than take them to a place called "Fastsigns" (chain type sign operation) that will output them in black adhesive vinyl..... with the "white" areas cut out (reverse).  Put that on a milky white plastic substrate.... and you have the makings of a backlit panel with a few leds behind it.  They charge by the sq ft of vinyl... and it'll work out to less than $7.00 per panel.  Expensive...... but cheaper than other backlighting options.

The whole Serif Publishing suite only cost me something like $60.  I've been using the Serif products for YEARS and YEARS....I started with version 1.  I think this one is version 7.  Do a web search for them.

best,

...................john
Image ImageIntel i7 960 quad 3.2G LGA 1366, Asus P6X58D Premium, 750W Corsair, 6 gig 1600 DDR3, Spinpoint 1TB 720
User avatar
JBaymore
Global Moderator
Global Moderator
 
Posts: 10020
Joined: Sat May 24, 2003 9:15 am
Location: New Hampshire

Re: Cockpit Construction Continued (Part 8)

Postby Fly2e » Mon Aug 30, 2004 1:24 pm

And Dave...... I take your statement as a total compliment.  
That was my intent!  ;D   ;D

Dave
COMING SOON!
User avatar
Fly2e
Colonel
Colonel
 
Posts: 198020
Joined: Thu Jan 17, 2002 5:29 pm
Location: KFRG

Re: Cockpit Construction Continued (Part 8)

Postby JBaymore » Sat Oct 02, 2004 7:18 pm

Wiring Of Cockpit Lights Panel

I got to doing the 12V DC wiring for the the cockpit lights panel which was described above in the thread tonight.
Last edited by JBaymore on Sat Oct 02, 2004 7:24 pm, edited 1 time in total.
Image ImageIntel i7 960 quad 3.2G LGA 1366, Asus P6X58D Premium, 750W Corsair, 6 gig 1600 DDR3, Spinpoint 1TB 720
User avatar
JBaymore
Global Moderator
Global Moderator
 
Posts: 10020
Joined: Sat May 24, 2003 9:15 am
Location: New Hampshire


Return to Home Cockpits and Setups

Who is online

Users browsing this forum: No registered users and 503 guests