textures

FSX including FSX Steam version.

textures

Postby alariosa » Sat Feb 17, 2007 9:11 am

does anybody know how to add textures to their aircraft?
alariosa
Ground hog
Ground hog
 
Posts: 3
Joined: Mon Dec 11, 2006 12:59 am

Re: textures

Postby gilly_is_alive » Sat Feb 17, 2007 9:33 am

when you download a new aircraft texture there are usually instructions in a readme file  you have to place the new texture.xxxx folder in your aircrafts directory and then add a new section to your aircraft.cfg file which is also in the aircraft folder but the new section is usualy given in the readme file.
gilly_is_alive
2nd Lieutenant
2nd Lieutenant
 
Posts: 184
Joined: Sun Dec 03, 2006 5:06 pm

Re: textures

Postby reider » Sun Feb 18, 2007 4:53 pm

Ya hey! I was looking for a new style Beech King Air 350. I found one but the layout was nothing like the existing file format in FSX, even though it was meant to work in it. So, I did some digging around, collected the program I needed and made my own-soon replace the grey cells I lost.

I now have a converted basic plane model, with a new colour scheme and my own text logo down each side. This is orientated the correct way, that took the most brain cells, lol. I tried the DDS plugin for Photoshop and PSP Pro but couldn`t get it to work, probably needed the .dll files they were all on about and didn`t exist on the sites that I could see.

Instead, I found a self contained program that opens .dds files, saves to .bmp, .jpeg, .psp, .gif, .png format and does it simply and efficiently with no messing, fat or gristle! Other than that I used PSP 8 to do the art work and the textual logos. Lastly, I manipulated the config files by hand to add another plane to the menu.

Just need to do a bit of tidying up, look at layers in depth and add a proper browser picture of the plane, done that once already in an earlier attempt at the whole thing, so thats no great shakes. Pictures asap...... for now, its got red, green, blue stripes in all the right places and `BrookTech` in red down each side.  I`ll post the details and destructions asap, if you want them.

Reider
Last edited by reider on Sun Feb 18, 2007 4:54 pm, edited 1 time in total.
reider
Captain
Captain
 
Posts: 634
Joined: Wed Jan 31, 2007 10:47 pm

Re: textures

Postby reider » Sun Feb 18, 2007 5:57 pm

This is an example of adjusting a base model from the King Air 350 examples.

You accept full responsibility for any changes you make, I and this forum am not responsible for any damage you do.  If you cannot or will not acccept this then please do not proceed, I and this forum am trying to help only and I can only say the procedure worked for me.

If you accepted the default FSX install location then......

(1) Open C:\Program Files\Microsoft Games\Microsoft Flight Simulator X\SimObjects\Airplanes folder.  Right click and copy the \Beech_King_Air_350 folder to a safe place, only then should you open it.

(2) Open the aircraft.cfg with notepad (choose from a list), DO NOT ELECT TO ALWAYS OPEN FILES OF THIS  KIND WITH NOTEPAD...... You should have fltsim 0-3 in there so copy the following default [fltsim.2] section and make the changes from this one to the next section I have changed to [fltsim.4] (only lines 1 (the title fltsim4), 2 (paint4 instead of 3) and line 7 (texture 4 instead of 3) have been changed.

[fltsim.2]
title=Beech King Air 350 Paint3
sim=Beech_King_Air_350
model=
panel=
sound=
texture=3
kb_checklists=Beech_King_Air_350_check
kb_reference=Beech_King_Air_350_ref
atc_id_color=0xffffffffff
atc_id=N350KA
ui_manufacturer="Beechcraft"
ui_type="King Air 350"
ui_variation="White/Blue & Gold stripes"
ui_typerole="Twin Engine TurboProp"
ui_createdby="Microsoft Corporation"
description="The King Air in all its variants is a beautiful airplane with classic styling and graceful lines. Many of the improvements over the years have provided better aerodynamic efficiency, increased muscle under the cowlings, greater speed, upgraded avionics and electrical systems, and increased cabin luxury. In addition to duties as a corporate shuttle, the plane is also available in cargo configurations."

[fltsim.4]
title=Beech King Air 350 Paint4
sim=Beech_King_Air_350
model=
panel=
sound=
texture=4
kb_checklists=Beech_King_Air_350_check
kb_reference=Beech_King_Air_350_ref
atc_id_color=0xffffffffff
atc_id=N350KA
ui_manufacturer="Beechcraft"
ui_type="King Air 350"
ui_variation="White/Blue & Gold stripes"
ui_typerole="Twin Engine TurboProp"
ui_createdby="Microsoft Corporation"
description="The King Air in all its variants is a beautiful airplane with classic styling and graceful lines. Many of the improvements over the years have provided better aerodynamic efficiency, increased muscle under the cowlings, greater speed, upgraded avionics and electrical systems, and increased cabin luxury. In addition to duties as a corporate shuttle, the plane is also available in cargo configurations."

(3) Looking in the Beech_King_Air_350 folder you will see amongst others 4 folders, Texture, Texture.1, Texture.2 and texture.3   Copy say texture.3 folder and paste it to your desktop.  Rename it to texture.4 and paste a copy back to the Beech_King_Air_350 folder.  You can now test all is well up to now, start FSX, go to freeflight and you should see two identical planes and colours, you can change the descriptors and the browser pic yourself later, this should be no great shakes.  Every time you test any cosmetic changes to the plane please shut FSX down each time or you`ll go around in circles thinking the changes haven`t worked.

(4) You need, to make this work two programs, PSP (or Photoshop or similar) and a .DDS plugin or seperate program.  I went for the seperate program, DDS Converter 2 from http://eliteforce2.filefront.com/file/DDS_Converter;29412

(5) You should still have the Texture.4 folder on the desktop, I would also place a backup Texture.4 folder within say a backup folder on the desktop too.  That way, you work in the Texture.4 folder, transfer it to the FSX working folder to test and use the backup folder to place a default texture.4 folder on the desktop when you mess up.

(6) Open the texture.4 folder and you will see amongst others this file.....
Beech_King_Air_1_T.dds

Open the DDS converter and use this folder and particular file as the input file. Convert to .jpeg or .bmp or whatever you prefer and save in the same folder.  Open the saved file, make your artistic changes and save the content.  Open DDS converter once again, use the Beech_King_Air_1_T.jpeg or whatever picture file format you used as input and then output it back to the folder as Beech_King_Air_1_T.dds once again.

(7) Copy the texture.4 folder from the desktop and paste it into your working fsx program at
C:\Program Files\Microsoft Games\Microsoft Flight Simulator X\SimObjects\Airplanes\\Beech_King_Air_350 folder and overwrite the texture.4 folder we made earlier and tested.

(8) Now open FSX/freeflight and select the correct plane, et voila your masterpiece!!!  It should fly and work just like the rest, have fun and enjoy......

Reider
reider
Captain
Captain
 
Posts: 634
Joined: Wed Jan 31, 2007 10:47 pm

Re: textures

Postby reider » Sun Feb 18, 2007 6:17 pm

(1) If adding artwork you`ll also have to experiment with layers to make it work properly.  Though you can add simple stuff just to test it out first.

(2) Textual Descriptors should be easy enough to change from one plane to another, I`ll leave that one with you.

(3)  There is a base browser file in the texture folder for each plane already, adjust and save this to get your own.  I just use PSP, the screen grab in it is usually quite efective then save it to the same size with the correct title in the same texture folder.  There is a program that can be added to FSX to make a browser picture of any plane in use.  Thats quite handy, a google should find it or it may be on this site already.  

(4) Logo text on the fusilage needs some description, to save the rest of you the headach working it out yourselves.

There are two main pieces of fusilage, the long body part of the plane that the wheels/undercarriage are connected to.  I will describe these as TOP and BOTTOM, since this is how they appear in the .dds file that you`re adjusting.

TOP= Any text you choose, has to be typed into a text box in PSP and then use image/flip to get it the right way around-trust me, it will be right in the working model

BOTTOM=Any text you choose, has to be typed into a text box in PSP and then use image/mirror to get it the right way around-trust me once again, it will be right in the working model

Not done the wings yet, but they should be easy to suss out from these examples.

I think thats about it, hope this helps,

Reider
reider
Captain
Captain
 
Posts: 634
Joined: Wed Jan 31, 2007 10:47 pm

Re: textures

Postby reider » Thu Feb 22, 2007 11:21 am

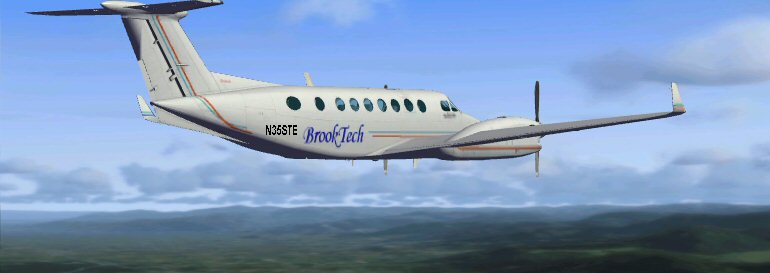
Heres one I`m currently working on.  The stripes have been recoloured and slightly reworked.  My Domain name added to both sides, when the door opens downward the name logo moves with it too.  The plane id is altered to my initials but that is done in FSX anyway.  The physical flight model has smooth lines and text, not as in this screen grab which really doesn`t do it justice.  It is fully optomosed for FSX, not a 2004 rework as is usually the case.  This means it can be used as a base model and readily adapted to other colours and designs.  The base FSM white Beech King Air 350 is the best one to start with though, unless changing colours on the strips (use plenty of magnifying glass with this.....).

Image

Reider
reider
Captain
Captain
 
Posts: 634
Joined: Wed Jan 31, 2007 10:47 pm

Re: textures

Postby reider » Thu Feb 22, 2007 11:26 am

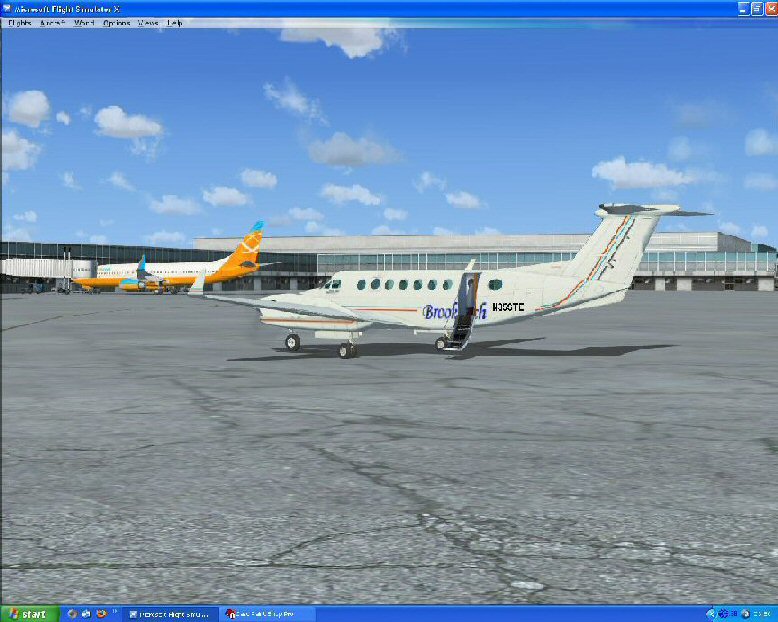
Here is the same model with the door/steps down at Manchester, UK EGCD.  The panel used (not shown yet) is from a 2002/2004 rework someone else did with Win 98 guages.  So, I reloaded the panel and changed it to FSX gauges entirely.  Just a couple of switches to add and some to move a bit so they display properly.  This gives Garmin, undercarriage lift/lower, all switches and lights, ignition on/off, everything all on one panel and one screen-handy for anyone using just one monitor and can be adapted to any Beech King Air 350 colour type.

Image

Reider
reider
Captain
Captain
 
Posts: 634
Joined: Wed Jan 31, 2007 10:47 pm

Re: textures

Postby reider » Thu Feb 22, 2007 11:34 am

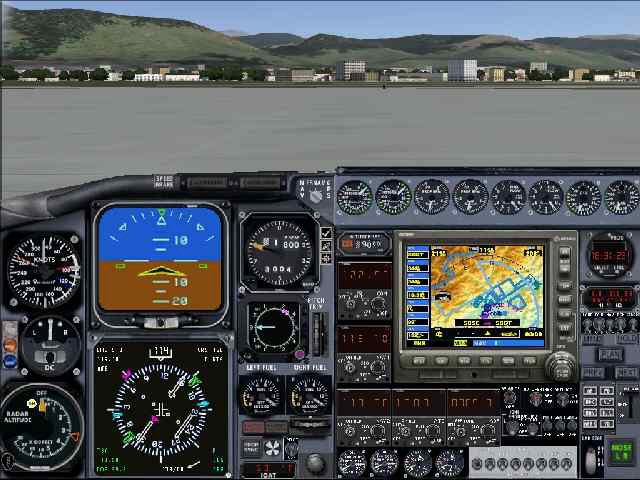
Here`s the reworked or partially reworked panel, which shows the original guages.  I have replaced the HSI and RMI guages, got rid of the Garmin Icon because its now embedded in the main panel, and added the ECU (Engine Control Unit) Icon to call the quadrant, this is showing but not working.  The ignition switches need some realignment as do some of the others.  Basically though the concept is the same as this one.

Image

Please note I cannot let anyone have this panel as it wasn`t mine in the first place, I`ve only adapted it to FSX.  I can however tell you where to download it free and `how to make the changes, freely`.   ;D

Reider
reider
Captain
Captain
 
Posts: 634
Joined: Wed Jan 31, 2007 10:47 pm

Re: textures

Postby ATI_7500 » Thu Feb 22, 2007 1:08 pm

That's one crowded panel!  :o

Horror!
ATI_7500
 

Re: textures

Postby reider » Thu Feb 22, 2007 6:34 pm

You`re dead right there.  I don`t need it but it wasn`t made for its aesthetics though, it was made to be functional and allow stuff to run off one monitor.  I use dual monitors, the normal uncluttered panel and the external bodywork on mine.  The panel is just on another form of the bodywork for fooling about with and learning how to do it all for FSX rather than 2002/4, its a testbed really.

I`ve now crossed the two coloured lines on the fusilage twice so the colours reverse and then join back, looks quite effective, time to fly it again now.  I`m enroute from Singapore to Malaysia, stopped for fuel and then its on to Australia for the next leg......

Reider
reider
Captain
Captain
 
Posts: 634
Joined: Wed Jan 31, 2007 10:47 pm


Return to Flight Simulator X (FSX) and Steam

Who is online

Users browsing this forum: No registered users and 703 guests