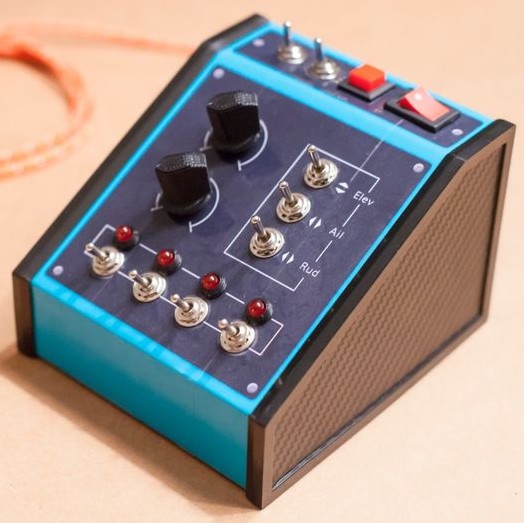
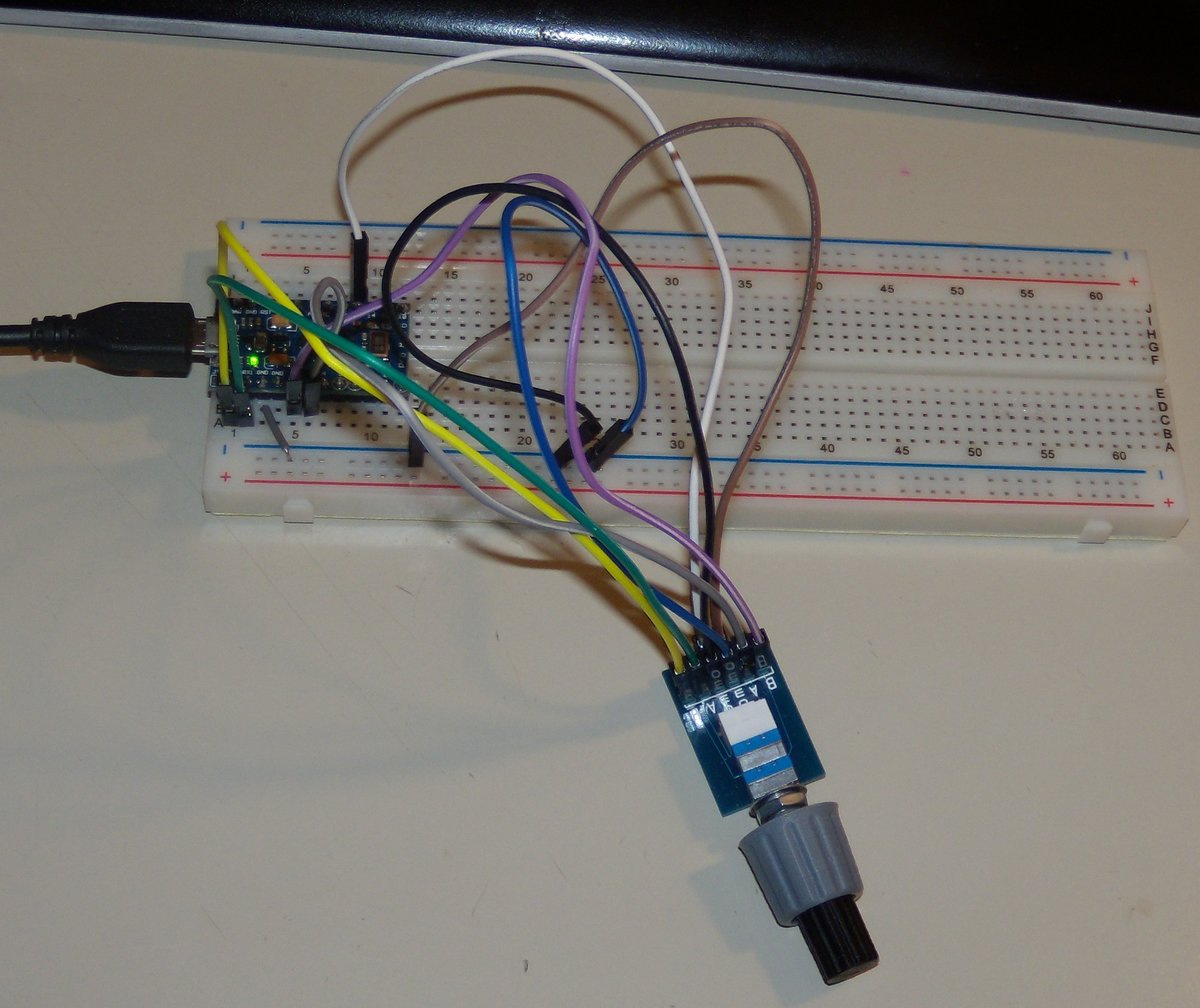
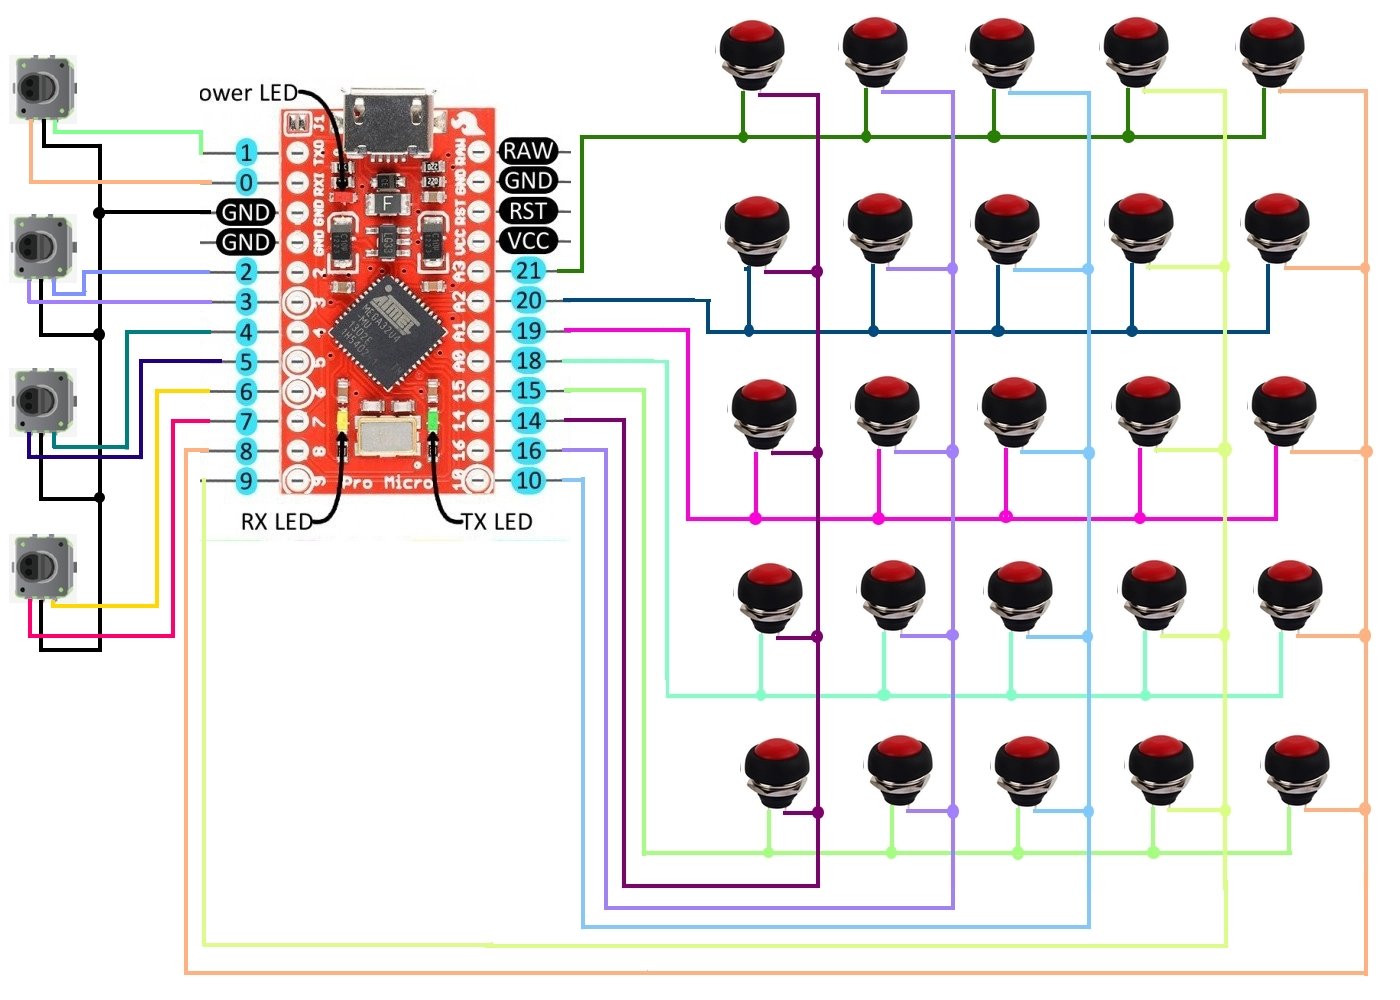
The following is the Arduino code in it's entirety.This lets you control 4 rotary encoders, for things such as setting radio frequencies, and 25 buttons/ switches.
With a little knowledge it can be easily expanded.
THIS IS ONLY THE TIP OF THE ICEBURG AS TO WHAT YOU CAN DO.--------------------------------------------------------------------------------------------------------------------------------//Simple buttonbox sketch
//Supports up to 25 buttons and up to 4 encoders
//version 0.1 by TOPMO3
//
//
//Arduino IDE 1.6.6 (or above) !
//
//Joystick library from Matthew Heironimus,
https://github.com/MHeironimus/ArduinoJoystickLibrary//
//Encoders code from Ben Buxton
//More info:
http://www.buxtronix.net/2011/10/rotary ... perly.html//
//Thank you guys!

//
#include <Keypad.h>
#include <Joystick.h>
#include <Keyboard.h>
#define ENABLE_PULLUPS
#define NUMROTARIES 4
#define NUMBUTTONS 25
#define NUMROWS 5
#define NUMCOLS 5
//define the symbols on the buttons of the keypads
byte buttons[NUMROWS][NUMCOLS] = {
{1,2,3,4,5},
{6,7,8,9,10},
{11,12,13,14,15},
{16,17,18,19,20},
{21,22,23,24,25},
};
struct rotariesdef {
byte pin1;
byte pin2;
int ccwchar;
int cwchar;
volatile unsigned char state;
};
rotariesdef rotaries[NUMROTARIES] {
{0,1,26,27,0},
{2,3,28,29,0},
{4,5,30,31,0},
{6,7,32,33,0},
};
#define DIR_CCW 0x10
#define DIR_CW 0x20
#define R_START 0x0
#define R_CW_FINAL 0x1
#define R_CW_BEGIN 0x2
#define R_CW_NEXT 0x3
#define R_CCW_BEGIN 0x4
#define R_CCW_FINAL 0x5
#define R_CCW_NEXT 0x6
const unsigned char ttable[7][4] = {
// R_START
{R_START, R_CW_BEGIN, R_CCW_BEGIN, R_START},
// R_CW_FINAL
{R_CW_NEXT, R_START, R_CW_FINAL, R_START | DIR_CW},
// R_CW_BEGIN
{R_CW_NEXT, R_CW_BEGIN, R_START, R_START},
// R_CW_NEXT
{R_CW_NEXT, R_CW_BEGIN, R_CW_FINAL, R_START},
// R_CCW_BEGIN
{R_CCW_NEXT, R_START, R_CCW_BEGIN, R_START},
// R_CCW_FINAL
{R_CCW_NEXT, R_CCW_FINAL, R_START, R_START | DIR_CCW},
// R_CCW_NEXT
{R_CCW_NEXT, R_CCW_FINAL, R_CCW_BEGIN, R_START},
};
byte rowPins[NUMROWS] = {21,20,19,18,15}; //connect to the row pinouts of the keypad
byte colPins[NUMCOLS] = {14,16,10,9,8}; //connect to the column pinouts of the keypad
//initialize an instance of class NewKeypad
Keypad buttbx = Keypad( makeKeymap(buttons), rowPins, colPins, NUMROWS, NUMCOLS);
void setup() {
Joystick.begin();
rotary_init();
Keyboard.begin();
}
void loop() {
CheckAllEncoders();
CheckAllButtons();
}
void CheckAllButtons(void) {
char key = buttbx.getKey();
if (key != NO_KEY) {
Joystick.setButton(key, 1); delay(50); Joystick.setButton(key, 0);
}
}
/* Call this once in setup(). */
void rotary_init() {
for (int i=0;i<NUMROTARIES;i++) {
pinMode(rotaries[i].pin1, INPUT);
pinMode(rotaries[i].pin2, INPUT);
#ifdef ENABLE_PULLUPS
digitalWrite(rotaries[i].pin1, HIGH);
digitalWrite(rotaries[i].pin2, HIGH);
#endif
}
}
/* Read input pins and process for events. Call this either from a
* loop or an interrupt (eg pin change or timer).
*
* Returns 0 on no event, otherwise 0x80 or 0x40 depending on the direction.
*/
unsigned char rotary_process(int _i) {
unsigned char pinstate = (digitalRead(rotaries[_i].pin2) << 1) | digitalRead(rotaries[_i].pin1);
rotaries[_i].state = ttable[rotaries[_i].state & 0xf][pinstate];
return (rotaries[_i].state & 0x30);
}
void CheckAllEncoders(void) {
for (int i=0;i<NUMROTARIES;i++) {
unsigned char result = rotary_process(i);
if (result == DIR_CCW) {
Joystick.setButton(rotaries[i].ccwchar, 1); delay(50); Joystick.setButton(rotaries[i].ccwchar, 0);
};
if (result == DIR_CW) {
Joystick.setButton(rotaries[i].cwchar, 1); delay(50); Joystick.setButton(rotaries[i].cwchar, 0);
};
}
}
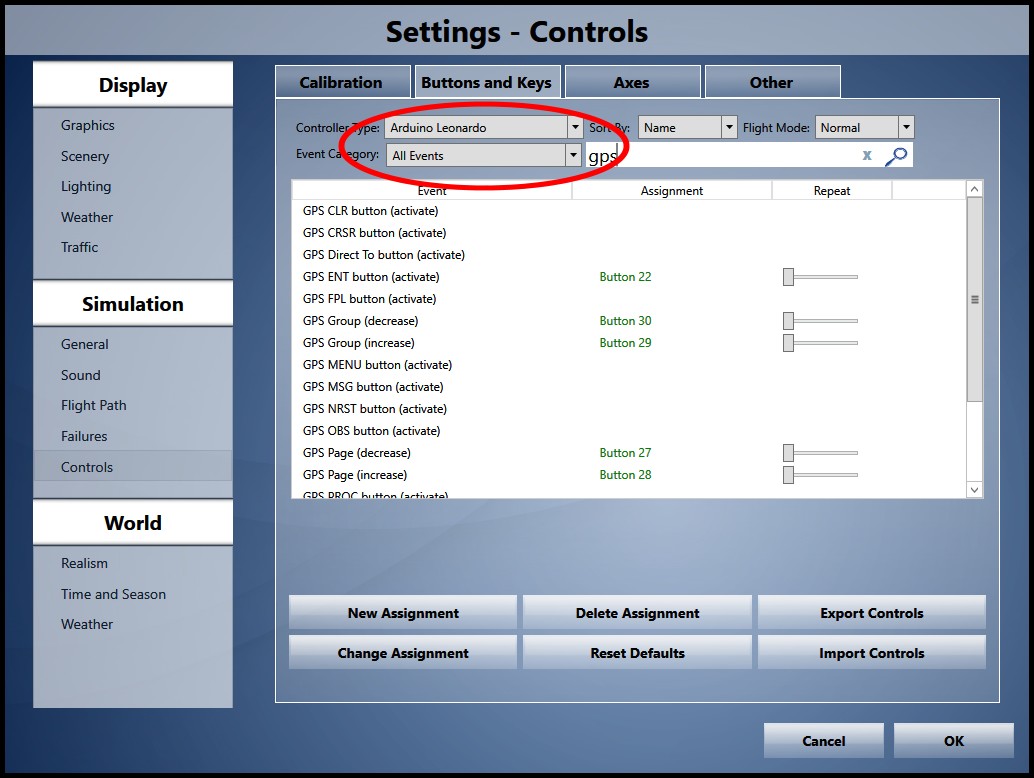
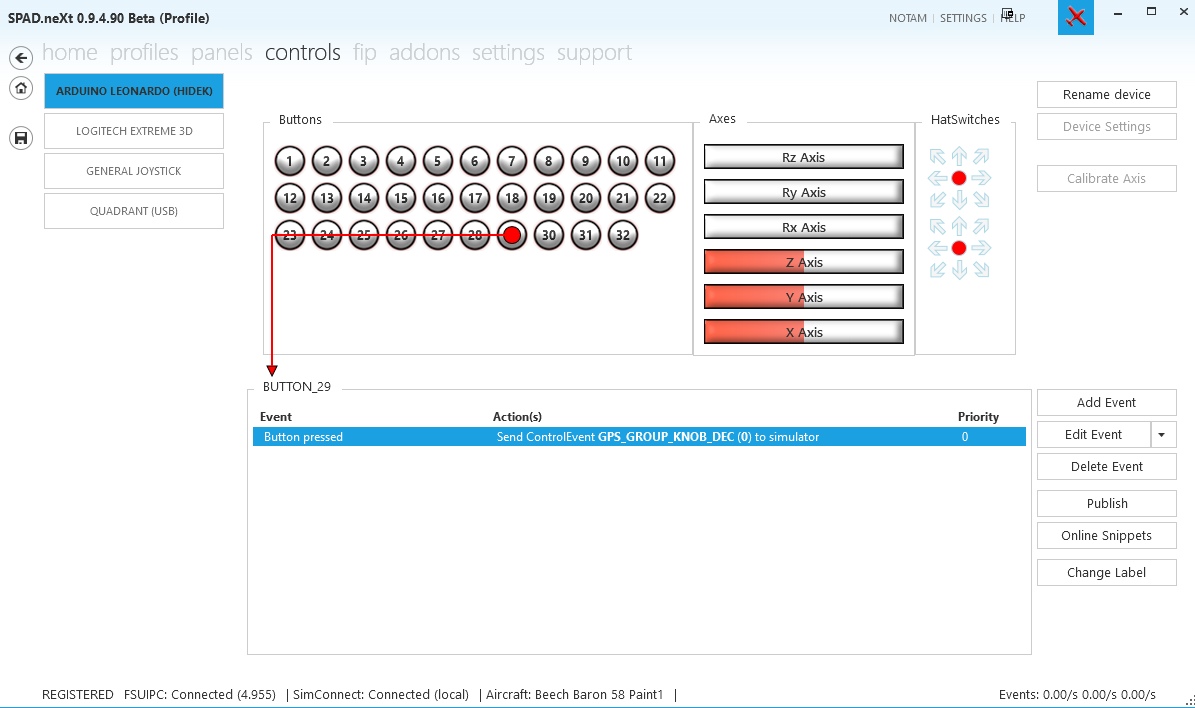
--------------------------------------------------------------------------------------------------------------------------------The neat part of this is that the encoder action shows up as brief button presses, which make programing them extremely easy.

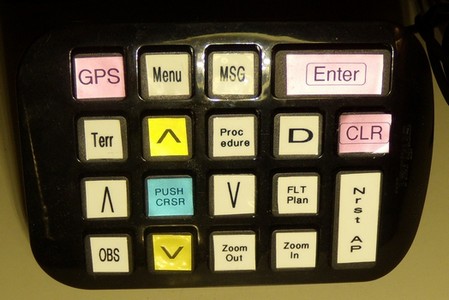
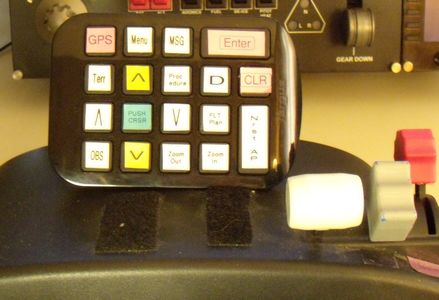
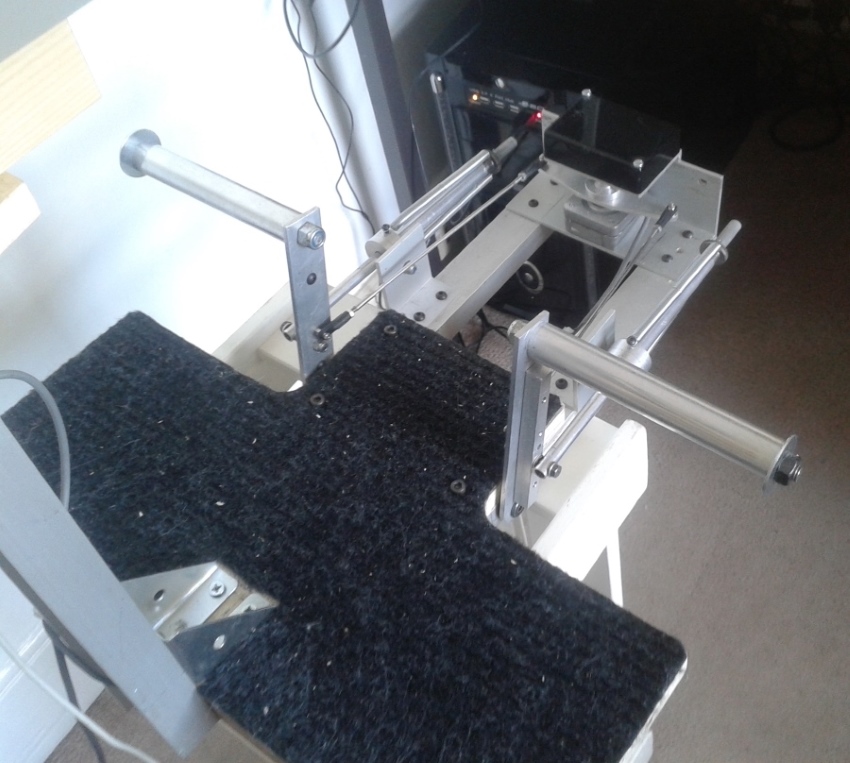
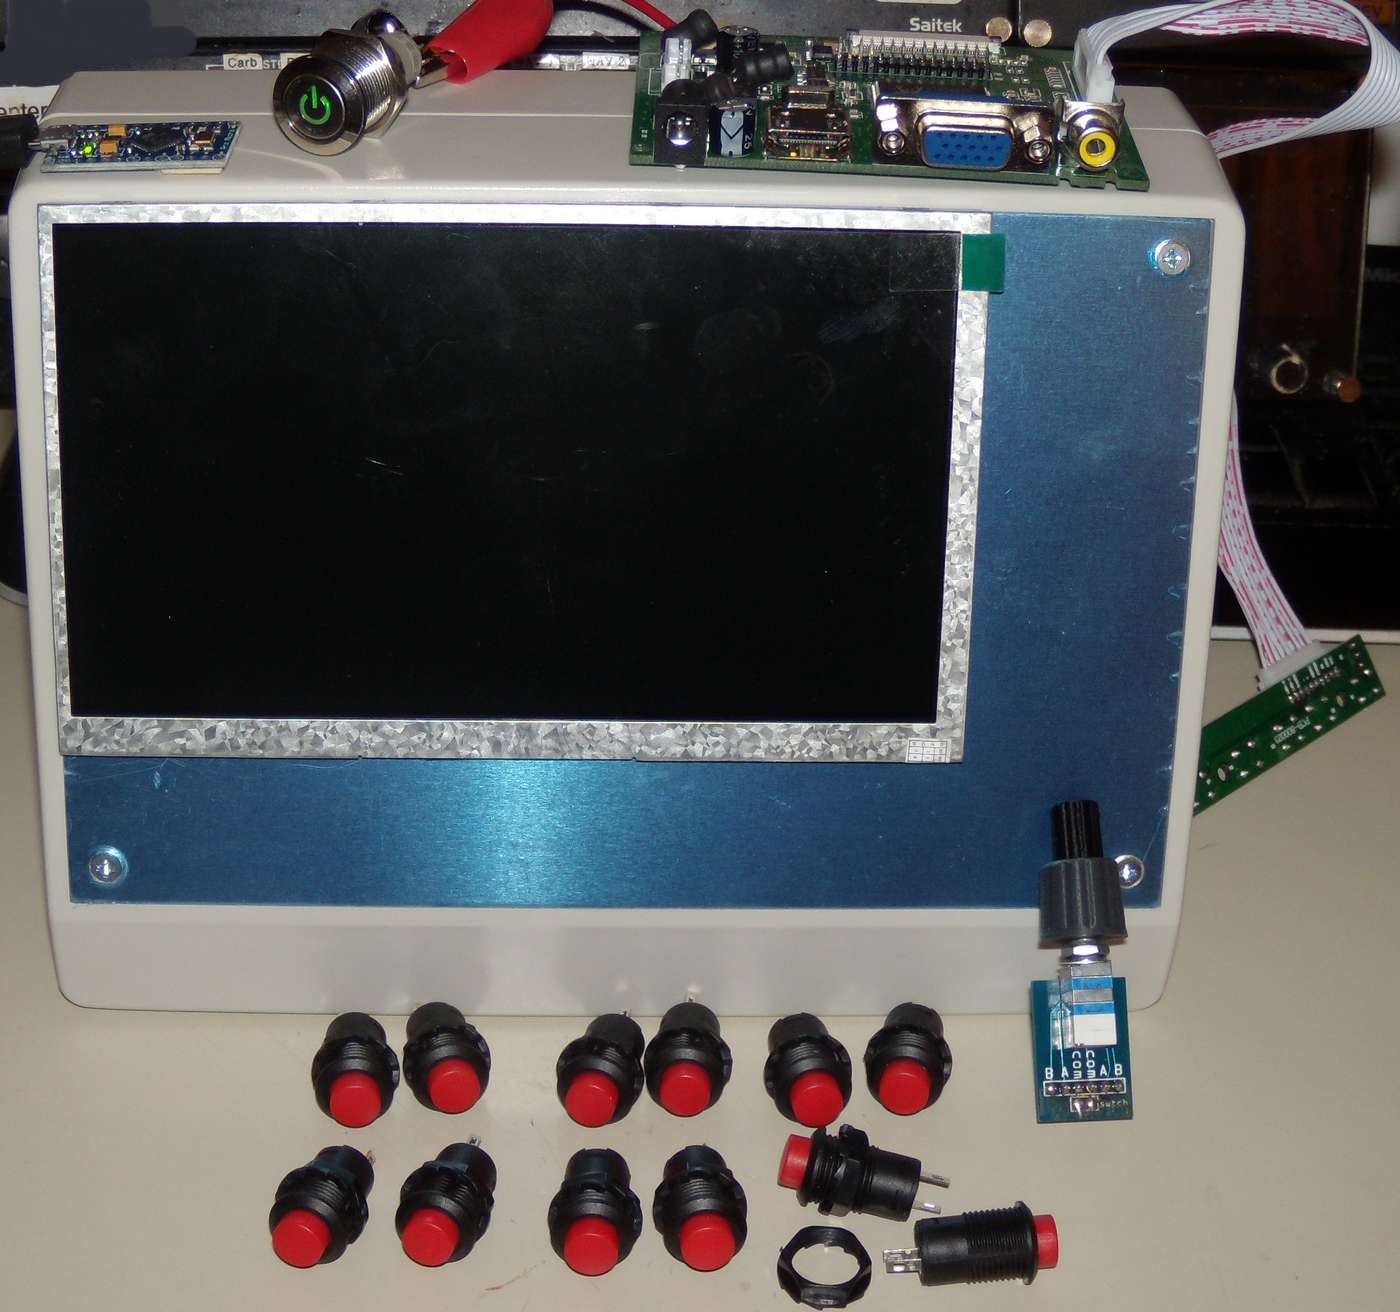
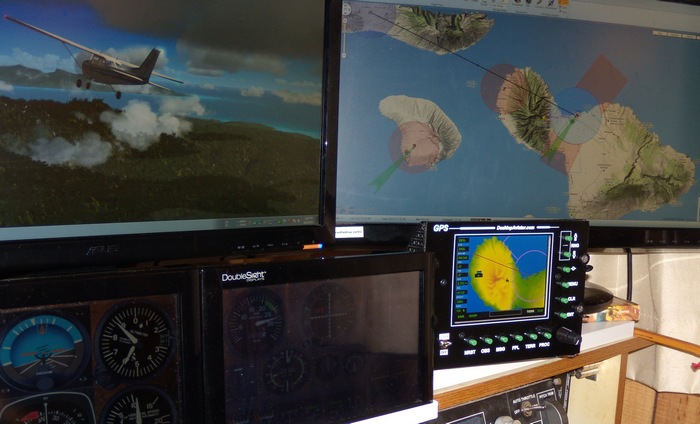
A concentric dual rotary encoder as used in the GPS will take up 2 encoder positions and 1 button position.
A very simple display of how an encoder "knows" which way you turn it.[youtube]http://www.youtube.com/watch?v=Wdk7fv5ZGw0[/youtube]
In the software, instead of the light coming on, the flight sim will see a button press. YOU tell the simulator what to do when the button is pressed.
EXACTLY like programming the buttons on a joystick. Simple.