I'm only concerned here with free software. There's plenty of suitable examples available which compare favourably with expensive commercial software. The Gimp can be used for this job but using advanced graphics editors to resize & save images seems to me like taking a sledgehammer to crack the proverbial nut. The method Gimp uses for saving images in JPEG format seems very complicated & confusing for a beginner to understand so I hunted round & found a plugin that makes things much easier. It's the same 'Save for Web' plugin that's featured in IrfanView.
Download Gimp 2.6 here http://www.gimp.org/
Installation is perfectly straightforward with no hidden options.
The RIOT plugin is posted here http://registry.gimp.org/node/20778
Ignore all the technical stuff. Scroll down the page & download the file named Full package (GIMP plugin + Riot.dll 0.3.5).zip.
To install the plugin, first extract the zipfile. Find three files named Riot.exe, Riot.dll & FreeImage.dll & paste them into your C:\Documents and Settings\
Before we begin I would like to emphasize that you will get the best results from working with the original screenshots saved in an uncompressed format. Every time you open & save an image in a compressed format like JPEG the quality suffers.
OK, we're ready to start. Let's suppose you've taken a masterpiece & wish to post it on the forum. Like most things on the computer this takes much longer to describe than actually do. Run Gimp 2.6 from the desktop shortcut & open the saved shot. (File > Open) My example was taken in FSX with the onboard screengrab feature (V key). It was saved in BMP format at the native resolution of my monitor which is 1440 x 900 pixels. It will need resizing to meet the forum limit of 1024 pixel width.
Click Image > Scale Image on the Gimp menu bar. This option window will open.
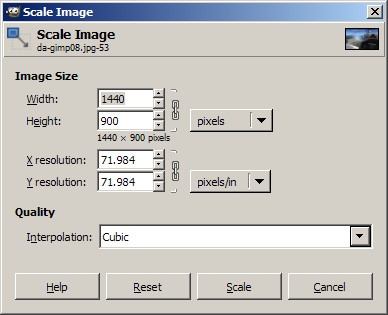
To change the size of the image type the desired pixel width in the Width box. I've chosen the maximum allowed size of 1024.

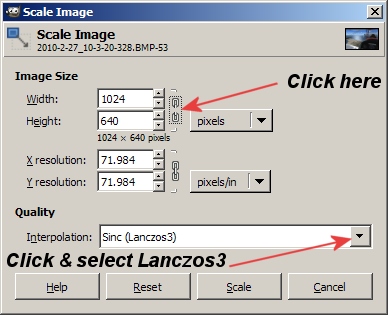
This is very important. Click the link icon as shown by the red arrow in my shot to preserve the original aspect ratio.
(I've also selected the Lanczos3 Interpolation option. I'm not sure if this makes any difference when reducing the scale but it can't do any harm.)
Click Scale to resize the image.
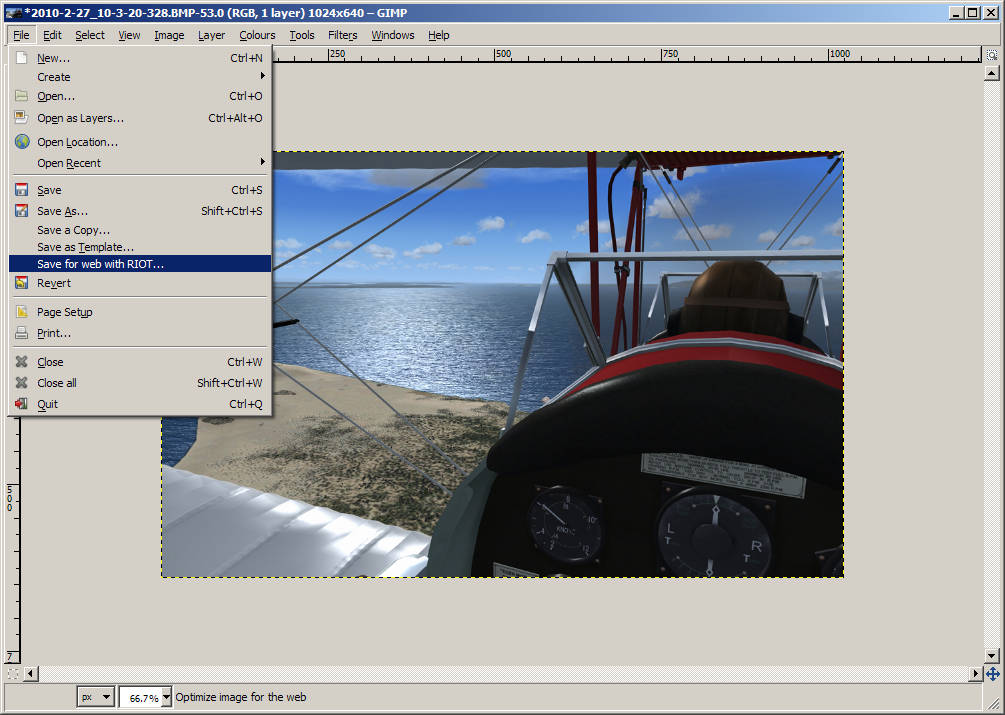
Now we want to save the resized image in JPEG format at the best possible quality within the forum limit of 150 Kb.
Click File > Save for Web with RIOT' on the menu bar.
(The following procedure is exactly the same as described in my IrfanView walk-through as it uses the same plugin.)
This window will open.
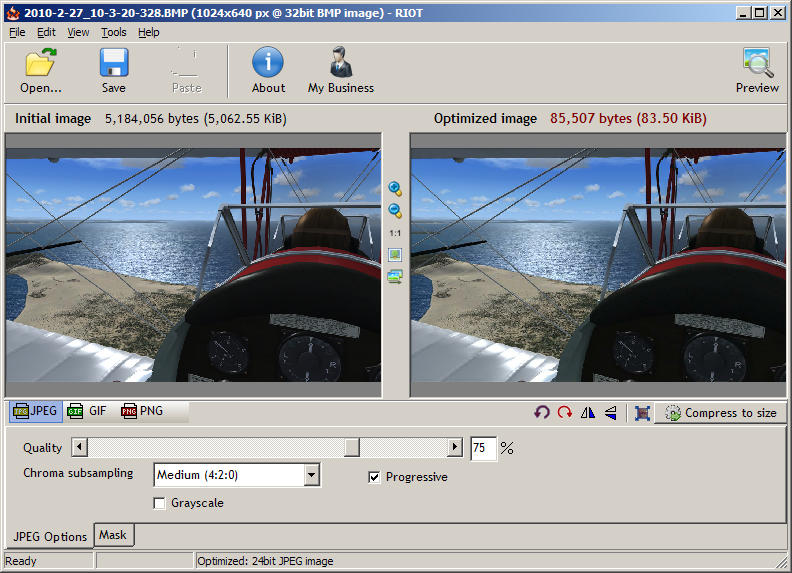
As this is the first time we've used this feature we might need to adjust some of the settings. I suggest changing the Chroma subsampling option to None (4:4:4).
You can experiment with the Progressive option but I usually leave it enabled. It seems to save a few precious Kb.
There are several ways to adjust the file size of the saved image. The easiest method is the "Compress to size" feature. Click the button & type the desired file size in the box. I've used 149 to keep it below the 150 Kb limit. (This doesn't always work accurately but can easily be adjusted manually.)
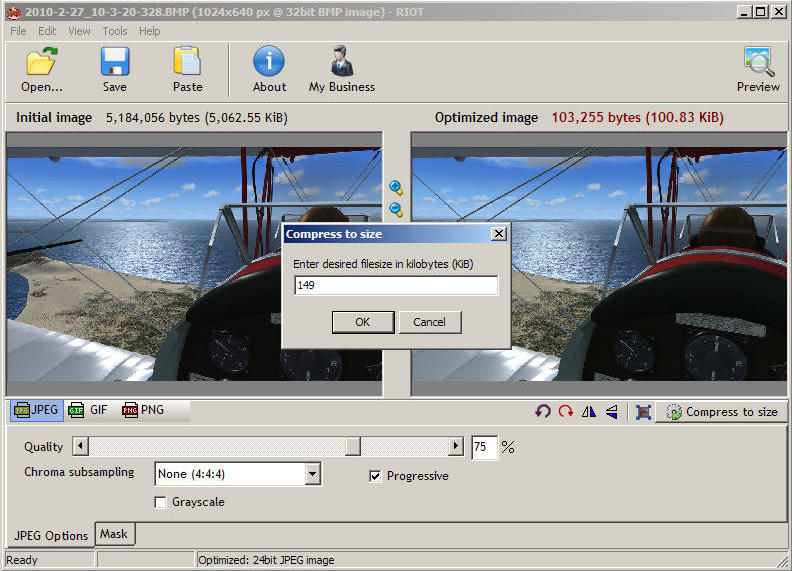
Click OK & this is what you get. The file size of the saved image is shown in red above the right-hand image.
I had to reduce it one notch on the left-hand Quality arrow to bring it below 150 Kb.

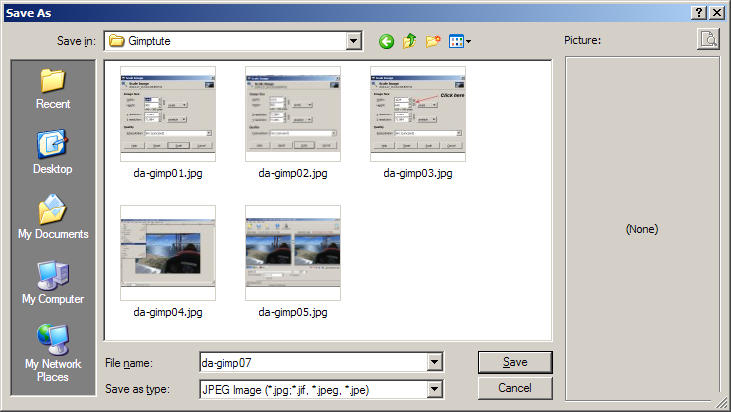
Finally, click the Save button & save the shot to a suitable location ready for uploading to the SimV server. Please remember to use a file name unique to you & with no spaces. Words can be separated with a dash or underscore if you wish.
That's all there is to it. This is the result.
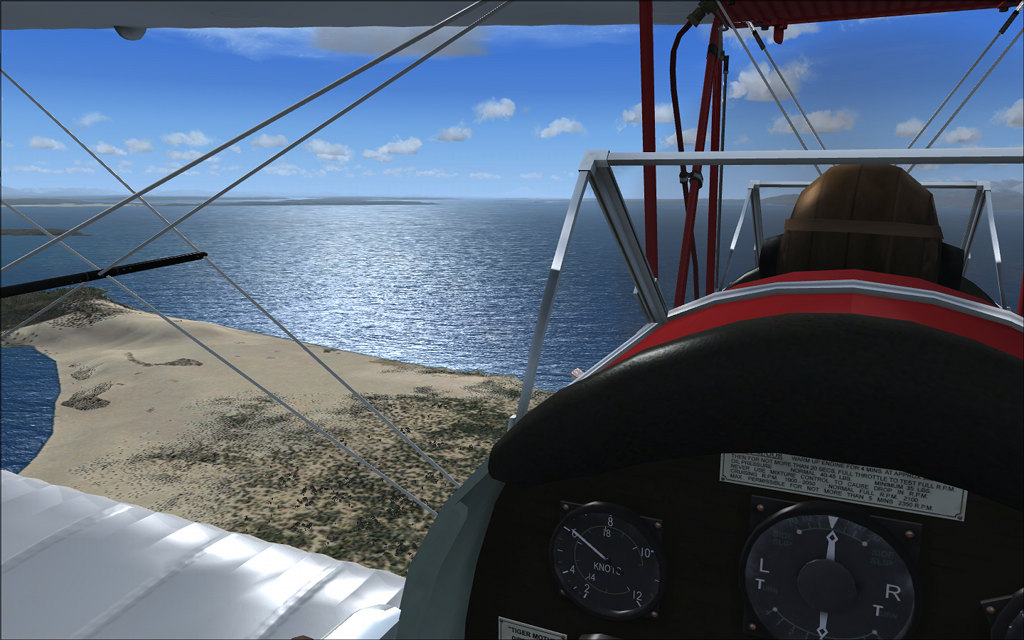
I ended up posting this in a bit of a rush as it took longer than expected. I'll be happy to correct any silly mistakes.


