Tranquility
Hello gentlemen,
I experimented with the subject of "creating moody light" and even got some results that are, imho, worth showing.
This one gave the title to this discussion and i think it hits the nail.. A lonely Beaver whose pilot is enjoying the last warm sunbeams of a fall's evening:
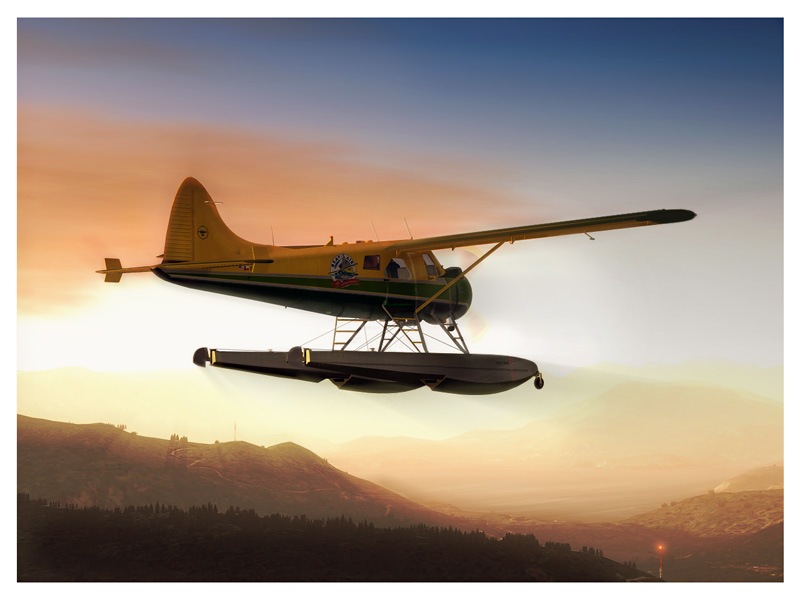
You can find a larger version here (ImageShack)
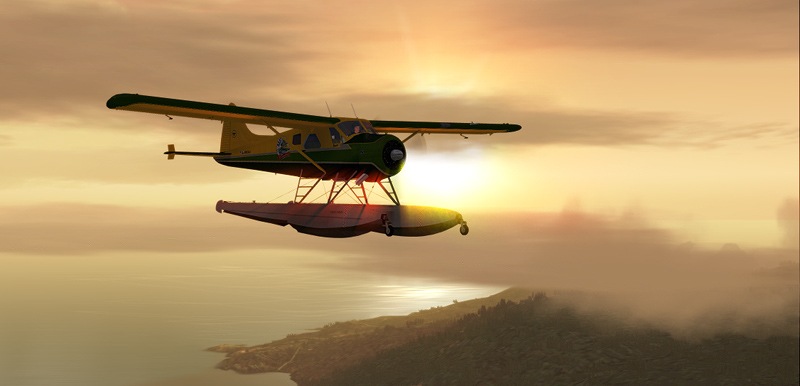
And a 2nd one from the same flight, Canadian Evening Mood.. Mountains, Water and a setting sun
The 3rd was taken at almsot the same place, jsut a bit south. You can sea the city of Vancouver in the back while this FedEx freighter turns away from Vancouver Intl.

All these shots have been created by basically applying almost the same technique... duplicate the image layer and set the blending mode of the top one to "color dodge". Then play with opacity and erase here and there.. voila, very intense lights.
For comparison just check this image, i placed the final version and the original jsut below each other:

btw.. Recently I was following a nasty discussion because of "compression ruined ..." phrase.. I don'T think you find obvious compression artifacts in the above shots although all are well below 100kB (not the comparison one, i chose a high compression there to stay below 100k but that'S ok as it is pretty large). For similar results I recommend using Irfanview, save as jpg with a compression of 93-95 should give you clean results and handy file sizes.
I hope I haven'T bored you with this post,
cheers gentlemen
Simplex
I experimented with the subject of "creating moody light" and even got some results that are, imho, worth showing.
This one gave the title to this discussion and i think it hits the nail.. A lonely Beaver whose pilot is enjoying the last warm sunbeams of a fall's evening:
You can find a larger version here (ImageShack)
And a 2nd one from the same flight, Canadian Evening Mood.. Mountains, Water and a setting sun
The 3rd was taken at almsot the same place, jsut a bit south. You can sea the city of Vancouver in the back while this FedEx freighter turns away from Vancouver Intl.
All these shots have been created by basically applying almost the same technique... duplicate the image layer and set the blending mode of the top one to "color dodge". Then play with opacity and erase here and there.. voila, very intense lights.
For comparison just check this image, i placed the final version and the original jsut below each other:
btw.. Recently I was following a nasty discussion because of "compression ruined ..." phrase.. I don'T think you find obvious compression artifacts in the above shots although all are well below 100kB (not the comparison one, i chose a high compression there to stay below 100k but that'S ok as it is pretty large). For similar results I recommend using Irfanview, save as jpg with a compression of 93-95 should give you clean results and handy file sizes.
I hope I haven'T bored you with this post,
cheers gentlemen
Simplex


