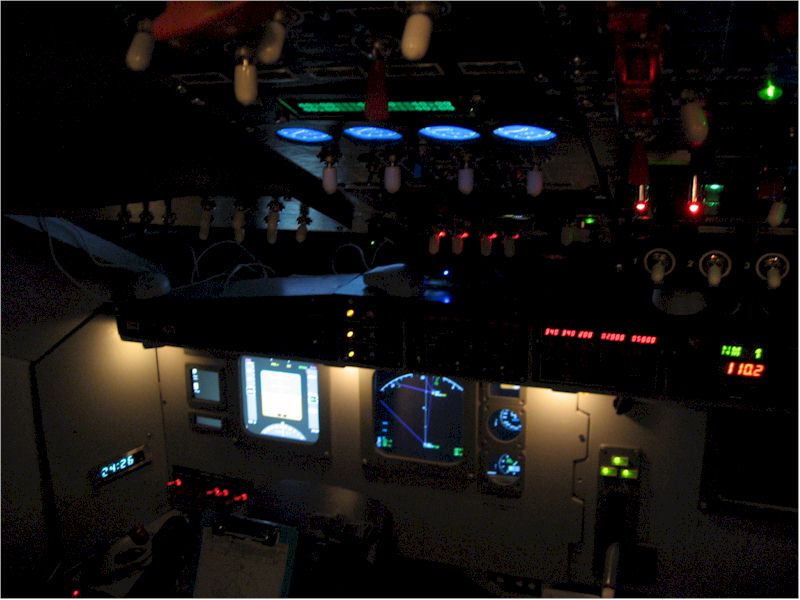
Cockpit Construction Continued (Part 36)

Only for Genuine FS fanatics! Taking this hobby from Real to Surreal? Or maybe just combining 4 hobbies into 1 ;)

Cockpit Construction Continued (Part 36)

Postby JBaymore » Thu Jul 19, 2007 10:34 pm

New Power Supply

As I mentioned in Part 35, upon NickN's recommendation I installed a new 600 Watt Rosewill power supply in the main flight sim computer.
Last edited by JBaymore on Thu Jul 19, 2007 10:54 pm, edited 1 time in total.
Image ImageIntel i7 960 quad 3.2G LGA 1366, Asus P6X58D Premium, 750W Corsair, 6 gig 1600 DDR3, Spinpoint 1TB 720
User avatar
JBaymore
Global Moderator
Global Moderator
 
Posts: 10020
Joined: Sat May 24, 2003 9:15 am
Location: New Hampshire

Re: Cockpit Construction COntinued (Part 36)

Postby JBaymore » Thu Jul 19, 2007 10:52 pm

Landing Gear Indicator Lights

As I am trying to get the MIP and the glareshield area finished up a bit, I did the simple task of wiring up the landing gear position annunciator lights.
Last edited by JBaymore on Thu Jul 19, 2007 11:01 pm, edited 1 time in total.
Image ImageIntel i7 960 quad 3.2G LGA 1366, Asus P6X58D Premium, 750W Corsair, 6 gig 1600 DDR3, Spinpoint 1TB 720
User avatar
JBaymore
Global Moderator
Global Moderator
 
Posts: 10020
Joined: Sat May 24, 2003 9:15 am
Location: New Hampshire

Re: Cockpit Construction Continued (Part 36)

Postby JBaymore » Sat Aug 04, 2007 10:55 pm

Current Status

I was doing a training flight tonight online using the VOR 01 Approach into MGGT based on the tutorials in the Mike Ray "Flying the Boeing Sims" book, and thought I'd catch a shot of the pit as it now stands.  The shot is taken from the upper corner of the overhead looking toward the captain's seat side.

Here you go:

Image

best,

.......................john
Image ImageIntel i7 960 quad 3.2G LGA 1366, Asus P6X58D Premium, 750W Corsair, 6 gig 1600 DDR3, Spinpoint 1TB 720
User avatar
JBaymore
Global Moderator
Global Moderator
 
Posts: 10020
Joined: Sat May 24, 2003 9:15 am
Location: New Hampshire

Re: Cockpit Construction Continued (Part 36)

Postby expat » Mon Aug 06, 2007 7:02 am

Hi John.

You are really looking good, but if I may point out one item to you. The gear handle of the 146, the end where you have what looks like a small white wheel is a red lamp in the shape of a main wheel. Imagine what you have, but red plastic with a couple of lights inside (in the real world they blow quite often and it is right fiddle to change them) If memory serves me (I have been off the aircraft for 4 years now) it illuminated when the gear was in cycle (but don't quote me)

Matt
"A bit of a pickle" - British translation: A catastrophically bad situation with potentially fatal consequences.

PETA Image People Eating Tasty Animals.

B1 (Cat C) licenced engineer, Boeing 737NG 600/700/800/900 Airbus A318/19/20/21 and Dash8 Q-400
1. Captain, if the problem is not entered into the technical logbook.........then the aircraft does not have a problem.
2. And, if you have time to write the fault on a napkin and attach to it to the yoke.........you have time to write it in the tech log....see point 1.
User avatar
expat
Lieutenant Colonel
Lieutenant Colonel
 
Posts: 8679
Joined: Tue Apr 19, 2005 3:06 am
Location: Deep behind enemy lines....

Re: Cockpit Construction Continued (Part 36)

Postby JBaymore » Mon Aug 06, 2007 9:13 am

Matt,

Thanks for the comments.

You know ... I didn't know that about the 146.
Last edited by JBaymore on Mon Aug 06, 2007 9:16 am, edited 1 time in total.
Image ImageIntel i7 960 quad 3.2G LGA 1366, Asus P6X58D Premium, 750W Corsair, 6 gig 1600 DDR3, Spinpoint 1TB 720
User avatar
JBaymore
Global Moderator
Global Moderator
 
Posts: 10020
Joined: Sat May 24, 2003 9:15 am
Location: New Hampshire

Re: Cockpit Construction Continued (Part 36)

Postby machineman9 » Thu Aug 09, 2007 4:04 pm

its looking great!

what tools and things do you use to make sure each componant works like it should in the sim?
User avatar
machineman9
Major
Major
 
Posts: 4816
Joined: Fri Sep 17, 2004 9:05 am

Re: Cockpit Construction Continued (Part 36)

Postby Jakemaster » Thu Aug 09, 2007 4:06 pm

I noticed the ASUS logo on your MOBO...yay Asus LMAO!  They make a good laptop ;)
Jakemaster
 

Re: Cockpit Construction Continued (Part 36)

Postby JBaymore » Thu Aug 09, 2007 5:35 pm

its looking great!

what tools and things do you use to make sure each componant works like it should in the sim?


machineman,

Good question.  A lot depends on what you mean by "each component".  If a component is say a LCD monitor... then you need a computer to drive it.  ;)   If you are talking electronics at a really serious level (components inside a monitor) ... a testbed of equipment would include stuff like osiloscopes and frequency analyzers and all sorts of sophisticated goodies.  But for 99.999999% of the stuff...... it is FAR easier than that.

Probably 95 percent of the "components" are switches or rotary encoders.  4 percent are "off the shelf" modules that either work or don't.  The last 1 percent is........ ??????

For that a basic multimeter unit that allows you to test AC and DC voltages, resistance, continuity, amperage, and so on is asbsolutely indespensible.

A simple 9V DC battery with a set of alligator clips attached to the + and - poles for testing certain non-computer circuits.  

A simple home constructed "test light" that consists of a set of aligator clips to which you've added a red LED and a current limiting resistor.

That likely will get you most of what you need.

Add in a good soldering iron, good wire strippers, small needle nose pliers, tiny diagonal cutters, and an assortment of phillips and blade screwdrivers.

For building the rest of the wood stuff..... a circular saw, a sabre or jig saw, a good drill with a wide assortment of bits including countersink ones and hole saws, and good straightedges and measureing tapes and rulers.

If I think of more stuff... I'll post it.

best,

......................john
Image ImageIntel i7 960 quad 3.2G LGA 1366, Asus P6X58D Premium, 750W Corsair, 6 gig 1600 DDR3, Spinpoint 1TB 720
User avatar
JBaymore
Global Moderator
Global Moderator
 
Posts: 10020
Joined: Sat May 24, 2003 9:15 am
Location: New Hampshire

Re: Cockpit Construction Continued (Part 36)

Postby machineman9 » Fri Aug 10, 2007 8:50 am

so a lot of effort then  ;D

how about the connecting the lights to the computer? what software or what did you use for that? i guess for things like the landing gear, the rod could toggle a switch (G or something on the keyboard) and then just use the switch to change the lights from red to green after, say, 3secs or so?
User avatar
machineman9
Major
Major
 
Posts: 4816
Joined: Fri Sep 17, 2004 9:05 am

Re: Cockpit Construction Continued (Part 36)

Postby JBaymore » Fri Aug 10, 2007 12:01 pm

machineman,

Please... take the time to go back to that listing I gave you.  in that is almost a "step by step" explanation of how to build a pit from the ground up.

In there you will see how to connect "lights".  There are different ways based on different outcomes.  

Building something like a pit is almost as complicated as designing and wiring a REAL plane at times  ;).

best,

..................john
Image ImageIntel i7 960 quad 3.2G LGA 1366, Asus P6X58D Premium, 750W Corsair, 6 gig 1600 DDR3, Spinpoint 1TB 720
User avatar
JBaymore
Global Moderator
Global Moderator
 
Posts: 10020
Joined: Sat May 24, 2003 9:15 am
Location: New Hampshire

Re: Cockpit Construction Continued (Part 36)

Postby BuggsK100RS » Sun Aug 19, 2007 3:02 pm

Ok iv just read (ok some i did skim) the list of threads for you building you Pit WOW totaly amazing reading rearly well done!!!

The way your going tho i dould you will ever Finish!! (I mean that in a good way)  At some point you will get to the stage of Hmm im satified with this but if it only had a *insert the new thing here* and you will be adding and tweeking things all the time.  If there isent something you wont to Add, inprove or Change the Look of at any given moment,  well i dout that will ever happen.

What version of FS do you run from what i could gather its FS9 so would the pit still work with FSX or is that a total night meare you dont what to even contemplate??
BuggsK100RS
2nd Lieutenant
2nd Lieutenant
 
Posts: 170
Joined: Wed Aug 15, 2007 7:45 am
Location: UK

Re: Cockpit Construction Continued (Part 36)

Postby francsal » Wed Sep 12, 2007 11:43 am

[quote]Current Status

I was doing a training flight tonight online using the VOR 01 Approach into MGGT based on the tutorials in the Mike Ray "Flying the Boeing Sims" book, and thought I'd catch a shot of the pit as it now stands.
Last edited by francsal on Wed Sep 12, 2007 11:46 am, edited 1 time in total.
****X-Plane 11.41 / MSFS2020**** Ryzen 5 3600, GTX 1080FE, 32GB RAM ****
User avatar
francsal
Captain
Captain
 
Posts: 723
Joined: Thu Jan 15, 2004 3:58 pm
Location: Guatemala

Re: Cockpit Construction Continued (Part 36)

Postby JBaymore » Thu Sep 13, 2007 9:55 am

[quote]Welcome to Guatemala, John!
Image ImageIntel i7 960 quad 3.2G LGA 1366, Asus P6X58D Premium, 750W Corsair, 6 gig 1600 DDR3, Spinpoint 1TB 720
User avatar
JBaymore
Global Moderator
Global Moderator
 
Posts: 10020
Joined: Sat May 24, 2003 9:15 am
Location: New Hampshire

Re: Cockpit Construction Continued (Part 36)

Postby JBaymore » Fri Oct 05, 2007 7:11 pm

Last edited by JBaymore on Fri Oct 05, 2007 7:12 pm, edited 1 time in total.
Image ImageIntel i7 960 quad 3.2G LGA 1366, Asus P6X58D Premium, 750W Corsair, 6 gig 1600 DDR3, Spinpoint 1TB 720
User avatar
JBaymore
Global Moderator
Global Moderator
 
Posts: 10020
Joined: Sat May 24, 2003 9:15 am
Location: New Hampshire


Return to Home Cockpits and Setups

Who is online

Users browsing this forum: No registered users and 241 guests