What it takes to make an Arduino Flight Sim Controller

Graphics Cards, Sound Cards, Joysticks, Computers, etc. Ask or advise here!

What it takes to make an Arduino Flight Sim Controller

Postby OldAirmail » Tue Aug 02, 2016 9:06 pm

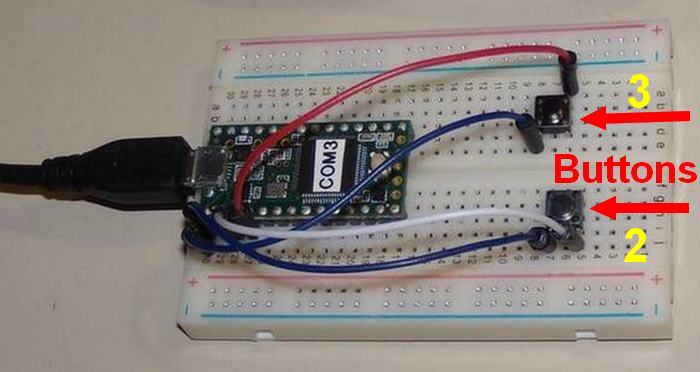
At it's most basic, this is it.

The mouse is there just for scale.

Image

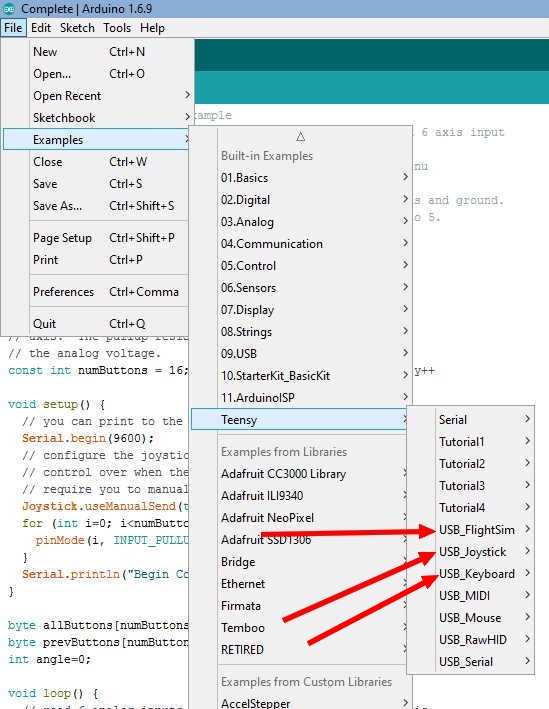
This is the Teensy V3.2 (Arduino). The program that was loaded onto it is a free sample. Loading the program only takes about 30 seconds. You only have to load the program ONE TIME. It'll keep the programming when off or disconnected.


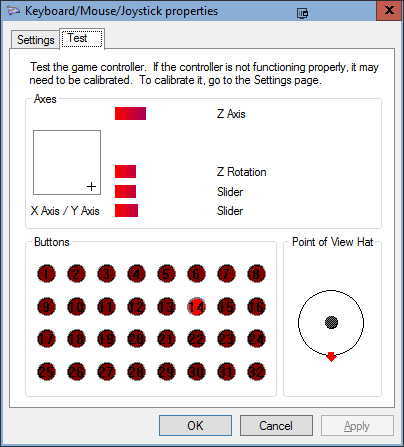
It shows up in the flight sims as a standard USB device (with LOTS of buttons :D ) in your flight sim.

Image


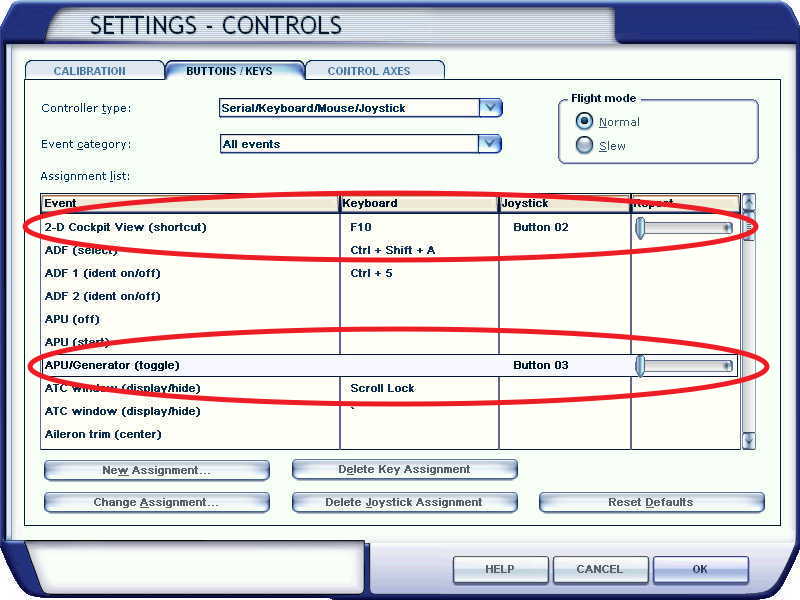
And you program it just as you would any joystick button.

Image

Image


This is called a "breadboard". It lets you try different things WITHOUT the need to solder anything.

Image


But this is just for experimenting. Parts and wires can be easily moved/reused. Make a mistake? Just move the wires to where they need to be - no tools needed.

Got a BIG project? They make bigger boards, and most (from the same manufacturer) can be connected together.

Once you have your design tested, and KNOW that it works, you can either learn to solder (it's very, very simple), Or have someone solder it for you.


See how much fun you can have with little money & a little bit of brain? :D

Yes. If you want to make a full cockpit, you'll have to learn a lot more.

ANYTHING that you can assign from within your flight sim can be done as simply as I just did the above.
.. .
Get the most out of your controls - SPAD.neXt

Image
. . . . . .Any time, any plane, any weather.
. . . . . . . . . . . . . Prepar3d V4
User avatar
OldAirmail
Major
Major
 
Posts: 4814
Joined: Sun Feb 17, 2013 3:06 pm
Location: Concrete, WA ICAO - 3W5

Re: What it takes to make an Arduino Flight Sim Controller

Postby Tonydb » Tue Aug 02, 2016 9:56 pm

Brilliant, can't wait to get some . :clap: :clap:
AMD FSX 8 Series 4.65 KHz, 16GB Memory, ASUS MB, 2 X 2TB hard drives, 1 X 1TB SSD, Orico 4TB external backup drive, AMD 9000 series Graphics Card, 3 X AOC 25" Monitors Saitek AV8R, Saitek throttle block, custom cooling
Tonydb
2nd Lieutenant
2nd Lieutenant
 
Posts: 174
Joined: Sat Feb 14, 2015 9:30 pm
Location: Nanning China

Re: What it takes to make an Arduino Flight Sim Controller

Postby Sinkrate » Wed Aug 03, 2016 1:47 am

Interesting, I've never used a teensey. Is it any faster than a standard Arduino?

Link to the sketch?

How much lag in the controls?
User avatar
Sinkrate
1st Lieutenant
1st Lieutenant
 
Posts: 400
Joined: Wed Jul 29, 2015 4:08 am
Location: UK

Re: What it takes to make an Arduino Flight Sim Controller

Postby OldAirmail » Wed Aug 03, 2016 4:25 am

"Is it any faster than a standard Arduino?"

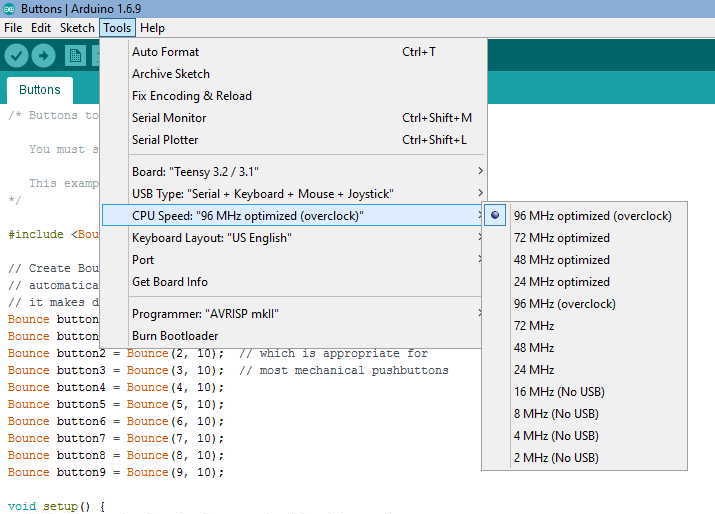
So far, my experience is VERY limited, but I think so. It's autocratically overclocked unless you choose not to.

Image


"Link to the sketch?"

As far as I know, it comes with the package. I didn't have to do anything but find & load it.

Image


"How much lag in the controls?"

I haven't noticed any, but the code is probably too short to notice anyway.

This is it in it's entirety, without any modification.

/* Buttons to USB Joystick Example

You must select Joystick from the "Tools > USB Type" menu

This example code is in the public domain.
*/

#include <Bounce.h>

// Create Bounce objects for each button. The Bounce object
// automatically deals with contact chatter or "bounce", and
// it makes detecting changes very simple.
Bounce button0 = Bounce(0, 10);
Bounce button1 = Bounce(1, 10); // 10 = 10 ms debounce time
Bounce button2 = Bounce(2, 10); // which is appropriate for
Bounce button3 = Bounce(3, 10); // most mechanical pushbuttons
Bounce button4 = Bounce(4, 10);
Bounce button5 = Bounce(5, 10);
Bounce button6 = Bounce(6, 10);
Bounce button7 = Bounce(7, 10);
Bounce button8 = Bounce(8, 10);
Bounce button9 = Bounce(9, 10);

void setup() {
// Configure the pins for input mode with pullup resistors.
// The pushbuttons connect from each pin to ground. When
// the button is pressed, the pin reads LOW because the button
// shorts it to ground. When released, the pin reads HIGH
// because the pullup resistor connects to +5 volts inside
// the chip. LOW for "on", and HIGH for "off" may seem
// backwards, but using the on-chip pullup resistors is very
// convenient. The scheme is called "active low", and it's
// very commonly used in electronics... so much that the chip
// has built-in pullup resistors!
pinMode(0, INPUT_PULLUP);
pinMode(1, INPUT_PULLUP);
pinMode(2, INPUT_PULLUP);
pinMode(3, INPUT_PULLUP);
pinMode(4, INPUT_PULLUP);
pinMode(5, INPUT_PULLUP);
pinMode(6, INPUT_PULLUP); // Teensy++ LED, may need 1k resistor pullup
pinMode(7, INPUT_PULLUP);
pinMode(8, INPUT_PULLUP);
pinMode(9, INPUT_PULLUP);

// Please be aware the X, Y, Z, Zr and Slider axes will have default
// settings, if you only use the buttons. This can give the appearance
// of the buttons interfering with the axes, if your PC software shows
// different default assumed values before your first button press.
// More details here:
// https://forum.pjrc.com/threads/29320-Te ... #post80275
}

void loop() {
// Update all the buttons. There should not be any long
// delays in loop(), so this runs repetitively at a rate
// faster than the buttons could be pressed and released.
button0.update();
button1.update();
button2.update();
button3.update();
button4.update();
button5.update();
button6.update();
button7.update();
button8.update();
button9.update();

// Check each button for "falling" edge.
// Update the Joystick buttons only upon changes.
// falling = high (not pressed - voltage from pullup resistor)
// to low (pressed - button connects pin to ground)
if (button0.fallingEdge()) {
Joystick.button(1, 1);
}
if (button1.fallingEdge()) {
Joystick.button(2, 1);
}
if (button2.fallingEdge()) {
Joystick.button(3, 1);
}
if (button3.fallingEdge()) {
Joystick.button(4, 1);
}
if (button4.fallingEdge()) {
Joystick.button(5, 1);
}
if (button5.fallingEdge()) {
Joystick.button(6, 1);
}
if (button6.fallingEdge()) {
Joystick.button(7, 1);
}
if (button7.fallingEdge()) {
Joystick.button(8, 1);
}
if (button8.fallingEdge()) {
Joystick.button(9, 1);
}
if (button9.fallingEdge()) {
Joystick.button(10, 1);
}

// Check each button for "rising" edge
// Update the Joystick buttons only upon changes.
// rising = low (pressed - button connects pin to ground)
// to high (not pressed - voltage from pullup resistor)
if (button0.risingEdge()) {
Joystick.button(1, 0);
}
if (button1.risingEdge()) {
Joystick.button(2, 0);
}
if (button2.risingEdge()) {
Joystick.button(3, 0);
}
if (button3.risingEdge()) {
Joystick.button(4, 0);
}
if (button4.risingEdge()) {
Joystick.button(5, 0);
}
if (button5.risingEdge()) {
Joystick.button(6, 0);
}
if (button6.risingEdge()) {
Joystick.button(7, 0);
}
if (button7.risingEdge()) {
Joystick.button(8, 0);
}
if (button8.risingEdge()) {
Joystick.button(9, 0);
}
if (button9.risingEdge()) {
Joystick.button(10, 0);
}
}
.. .
Get the most out of your controls - SPAD.neXt

Image
. . . . . .Any time, any plane, any weather.
. . . . . . . . . . . . . Prepar3d V4
User avatar
OldAirmail
Major
Major
 
Posts: 4814
Joined: Sun Feb 17, 2013 3:06 pm
Location: Concrete, WA ICAO - 3W5

Re: What it takes to make an Arduino Flight Sim Controller

Postby Sinkrate » Wed Aug 03, 2016 8:14 am

Thanks OAM; that's a good post.

Got my Teensey on order already!
User avatar
Sinkrate
1st Lieutenant
1st Lieutenant
 
Posts: 400
Joined: Wed Jul 29, 2015 4:08 am
Location: UK

Re: What it takes to make an Arduino Flight Sim Controller

Postby OldAirmail » Wed Aug 03, 2016 5:09 pm

You're welcome.


A pre-note, note for anyone just starting to think about this - Yeah. It REALLY is this simple. You can do a lot more if you want to, but making a button panel? Yeah, this is easy.

Needless to say, I'll want to make some changes, and add other things such as an encoder or two.


Even as it is, this post will allow most people to make a simple panel with buttons for the common key assignments that are most important to them.

For the, slightly, more adventurous, it's pretty easy to add a few LEDs to show status.

And when I say "pretty easy" I mean that making lights blink is the very first tutorial that you start out with.


Probably the biggest draw back most people will meet is their own skills at making a panel board. And if you start out with wood for the first project it'll be a cheap learning experience.

Lets face it though, professionally made panels WILL look better, even if they perform the same.

But there's no reason that you can't make your own, and then decide if you want something better looking

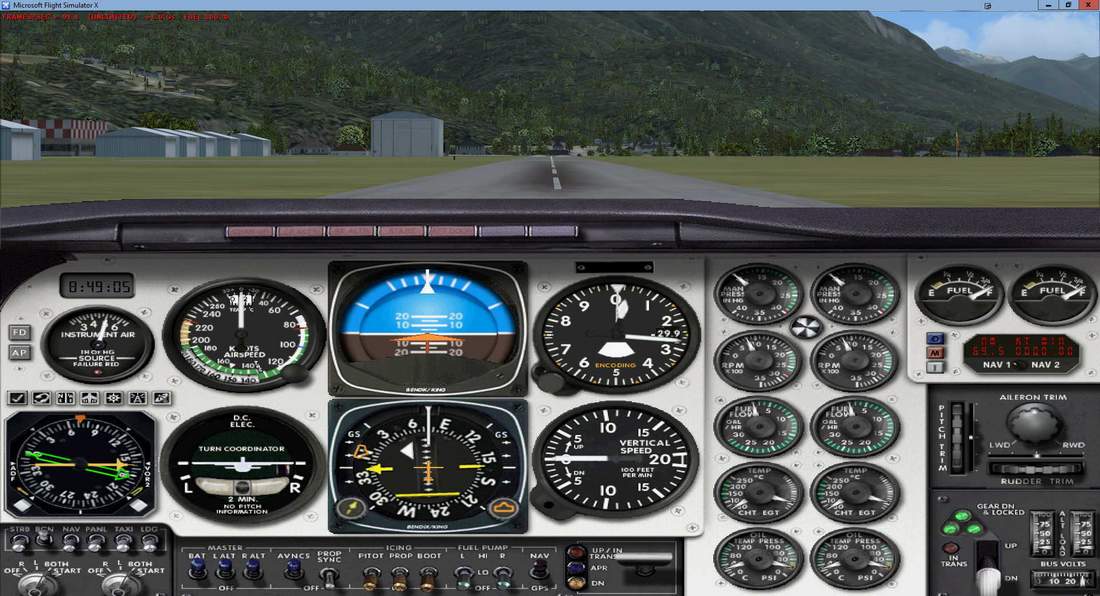
Just look at that first post. Push the number 2 button and have the 2d panel pop up.

Ugly? Yeah, but it's my ugly and it works. :D


Build them, or buy them - switches make the plane go. It really is more satisfying to apply the parking break, rev up the engine, take to the skies, and flip the switch to raise the landing gear.


One important note - Teensy 3.2 has the com port & HID built in to it. Not all others do, although I’m pretty sure that those capabilities can be added to most of the newer Arduino.
.. .
Get the most out of your controls - SPAD.neXt

Image
. . . . . .Any time, any plane, any weather.
. . . . . . . . . . . . . Prepar3d V4
User avatar
OldAirmail
Major
Major
 
Posts: 4814
Joined: Sun Feb 17, 2013 3:06 pm
Location: Concrete, WA ICAO - 3W5

Re: What it takes to make an Arduino Flight Sim Controller

Postby OldAirmail » Sun Aug 14, 2016 8:45 pm

Simple steps


Let me clearly state that I still know next to nothing about Arduinos and their programming.

But I'm following the samples that come with the Arduino programmer software. And even though I'm not very far in, I know enough to turn the Teensy 3.2 into a USB/HID (human interface device) and use it to set up buttons for a flight sim, or other game.

However, I do want to learn more, so I'm taking my time. All I can say is that I would like to start a flight sim button project in the next few weeks.


I've been looking for Dual rotary encoders with a push button function. It turns out to be harder than I thought - everybody that sells small quantities is out of stock.

It also turns out that that might be a good thing.

There are a VERY limited number of "recommended" dual rotary encoders ranging from $30 to $65, with controller boards in the same price range. And if that's what you have to pay, then that's what you have to pay, if you can find one.

Then again, maybe not.

I ran across this "company" - Propwash Simulation. I use the word loosely, because "they" only have a few products to sell on their website. That doesn't say anything bad about them. Everyone has to start somewhere, and if it works out then I'll wish them good luck. Not to mention spreading their name far and wide.

My main interest was with these -
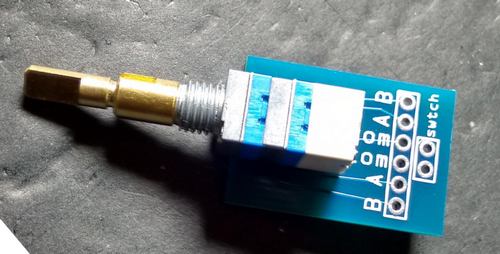
Dual Concentric Encoders WITH built in push switch AND with the knobs (black or grey) for $9.50.
Dual Concentric Encoders - WITH the knobs (black or grey) for $7.00.
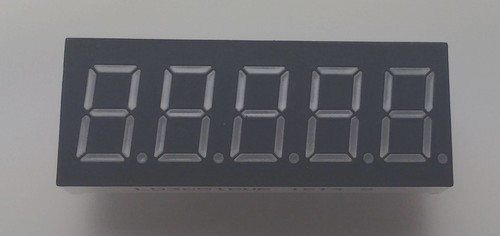
And a 5 digit 7 Segment LED (suitable for cockpit readouts) for $3.00

So, I ordered the Dual Concentric Encoders w/ Push Switch & the 5 digit 7 Segment LED for a total of $17.50 (shipping included).

Image . . Image


I'm usually a little leery of deals that are too good to be true, but using PayPal was an option, so I felt safe.

A short word on PayPal - I'm not a fan of theirs, but sometimes it's the only, or safest, way to go.


It's Sunday night, so I have no idea when I'll receive the package in the US mail.

As soon as I do, you'll know if I did get a real bargain. :D
.. .
Get the most out of your controls - SPAD.neXt

Image
. . . . . .Any time, any plane, any weather.
. . . . . . . . . . . . . Prepar3d V4
User avatar
OldAirmail
Major
Major
 
Posts: 4814
Joined: Sun Feb 17, 2013 3:06 pm
Location: Concrete, WA ICAO - 3W5

Re: What it takes to make an Arduino Flight Sim Controller

Postby Roypcox » Mon Aug 15, 2016 8:10 am

OAM Thanks so much for sharing your talents and time to explain things is a simple manner. I am most grateful. homebboy
Roypcox
1st Lieutenant
1st Lieutenant
 
Posts: 412
Joined: Sun Apr 20, 2014 6:17 am

Re: What it takes to make an Arduino Flight Sim Controller

Postby OldAirmail » Mon Aug 15, 2016 8:20 pm

Roypcox, thanks for the good words.


In a nut shell, this is what I'm thinking;

The Teensy Arduino is both cheap and VERY easy to work with.

No electrical engineering degree needed. In fact, at it's simplest, just get a small kit and work through a few tutorials until you're familiar with putting things together.

The more that you do know, the more things that are possible. But that's up to you. If all you want to do is make some buttons do useful things, then it really is easy.

BTW - The parts from that kit can be used to make most kinds of flight sim control boxes that you'd want.

For example;
Some push buttons to start your engines.
A button or lever to raise/lower your landing gear.
A momentary toggle switch to raise & lower flaps.
Setup some LEDs to show system status, such as the landing gear being up or down.


For anybody who might be interested.

How about 12 buttons and a dual rotary encoder to build your own GPS?

Gee, that's gotta be hard! - Nope. In fact it's simple.

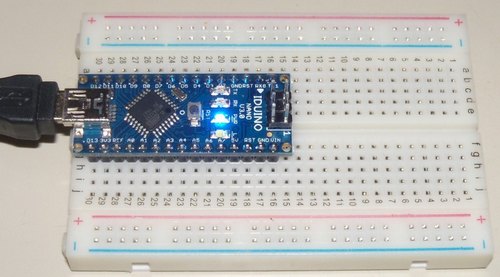
Teensy 3.2 Arduino - $25
Image

Dual rotary encoder with buttons - $9.50
Image

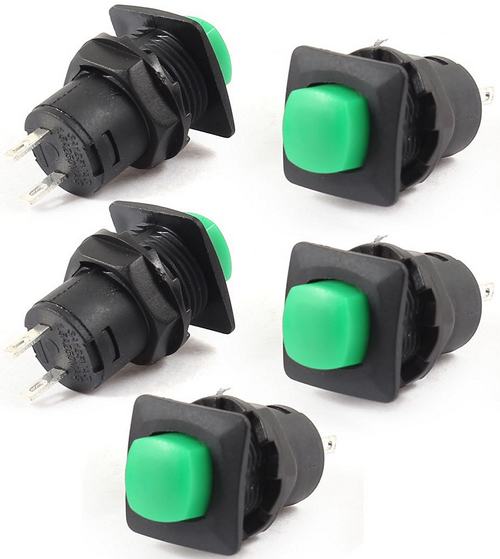
Twelve push buttons - $18 (5 for $6)
Image

BTW -If you get buttons like those, all you have to do is to drill a round hole, put it in, and you have a nice square button - you don't have to try cutting square holes to make it look good. :D

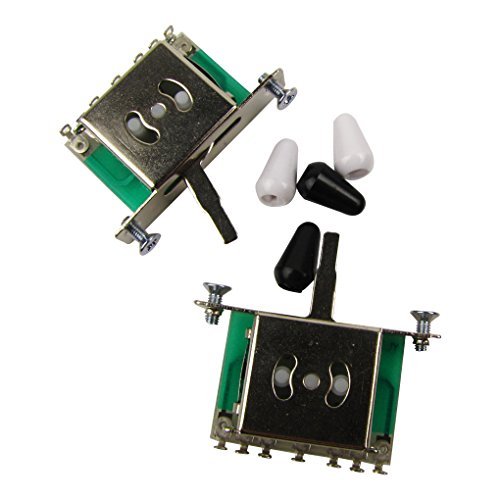
How about a "lever" for flaps? - Guitar 5 Way Pickup Selector toggle Switch - $7.60
Image


OK, how about programming! THAT has got to be hard! - Nope. That's simple too.

My second post in this set shows a sample that I loaded onto the Teensy 3.2. When I started up FSX the flight sim recognized it without any problem.

Image


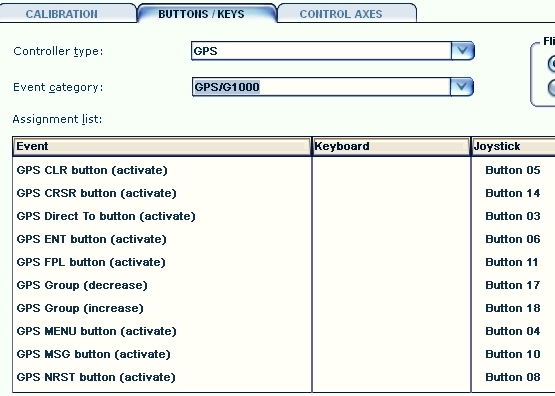
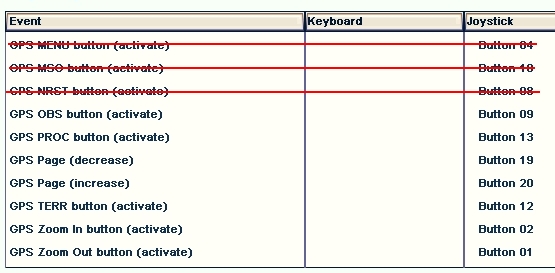
Yeah, BUT getting the flight sim to use those buttons for a GPS can't be very easy! - Sorry. It's all simple. Just assign them as you would any other joystick button. (button numbers WILL be different)

Image
Image


Once you get all of the parts together, and you're familiar with building simple circuits, even a beginner should be able to build it in one day. Probably in one morning.

You don't have to get fancy. Take a nice looking board, drill some holes, put it together. Done.

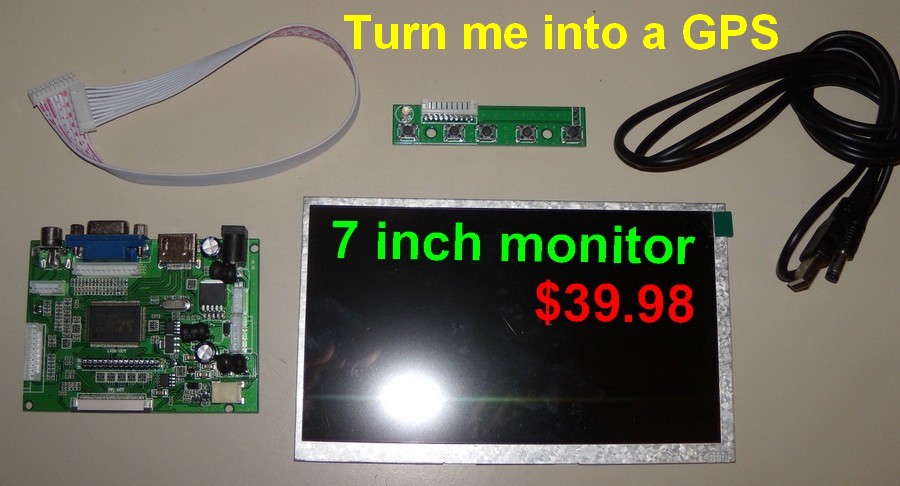
And you don't even need a monitor for the GPS if you add a button that pops up the GPS on-screen.


What? You want a monitor for your GPS? - You guessed it -also cheap & simple.

Image


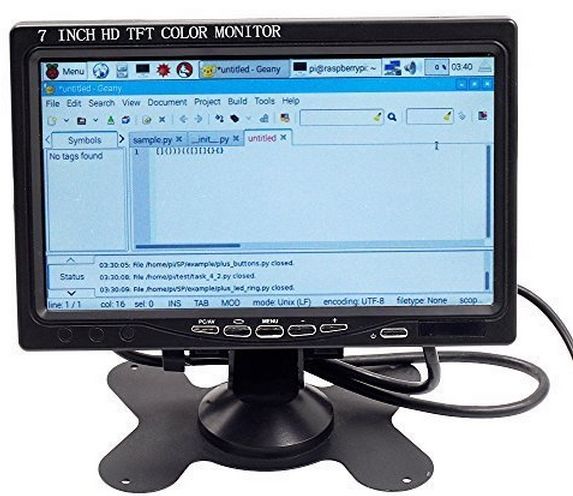
Or for $60, get this - Sunfounder 7" HD 1024*600 TFT LCD Screen Display HDMI Monitor for Raspberry Pi.
Image


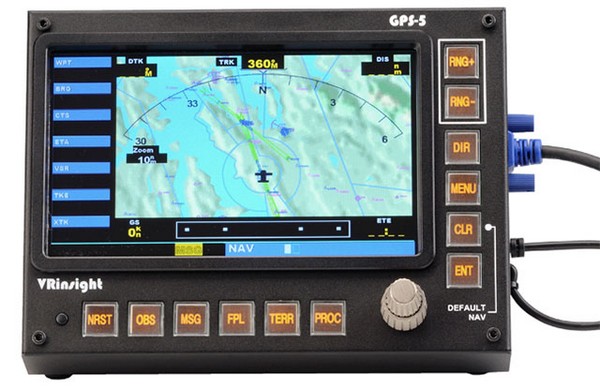
Just for price comparison - VRInsight GPS 5 Panel - EUR 361.34 / £282 / $393 USD
Image


One last note - these are not the cheapest prices or the only products that you can use.
.. .
Get the most out of your controls - SPAD.neXt

Image
. . . . . .Any time, any plane, any weather.
. . . . . . . . . . . . . Prepar3d V4
User avatar
OldAirmail
Major
Major
 
Posts: 4814
Joined: Sun Feb 17, 2013 3:06 pm
Location: Concrete, WA ICAO - 3W5

Re: What it takes to make an Arduino Flight Sim Controller

Postby OldAirmail » Mon Aug 15, 2016 9:44 pm

Sinkrate wrote:Thanks OAM; that's a good post.

Got my Teensey on order already!

By now you've probably received it. Any comments?
.. .
Get the most out of your controls - SPAD.neXt

Image
. . . . . .Any time, any plane, any weather.
. . . . . . . . . . . . . Prepar3d V4
User avatar
OldAirmail
Major
Major
 
Posts: 4814
Joined: Sun Feb 17, 2013 3:06 pm
Location: Concrete, WA ICAO - 3W5

Re: What it takes to make an Arduino Flight Sim Controller

Postby Sinkrate » Tue Aug 16, 2016 1:35 am

By now you've probably received it. Any comments?


Yeah, got the T 3.2. Wow, it really is Teensy; hard to believe it can do so much. :dance: I will definitely have a go at the GPS and also add some trim controls to my old yoke. I’ve got a load of buttons and encoders on order from China so it will be a nice winter project for me. I will try to put everything into the yoke so it’s all contained in one compact unit. I suspect it will require another USB lead to be added to the yoke, but that’s no big deal.
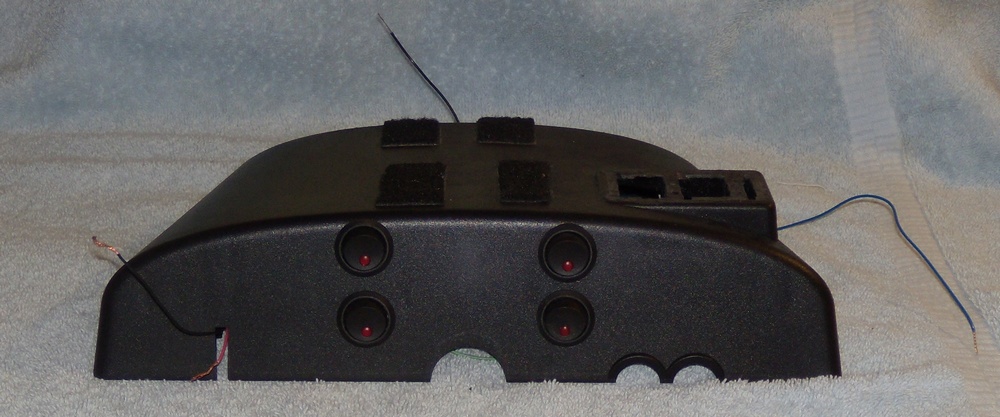
Thanks for all the info – very inspiring! :D
User avatar
Sinkrate
1st Lieutenant
1st Lieutenant
 
Posts: 400
Joined: Wed Jul 29, 2015 4:08 am
Location: UK

Re: What it takes to make an Arduino Flight Sim Controller

Postby OldAirmail » Tue Aug 16, 2016 6:01 pm

That sounds like something I did a couple of years ago, but with the board from a USB gamepad. The Teensy promises the ability to do MUCH more. :dance:

Image

Image
.. .
Get the most out of your controls - SPAD.neXt

Image
. . . . . .Any time, any plane, any weather.
. . . . . . . . . . . . . Prepar3d V4
User avatar
OldAirmail
Major
Major
 
Posts: 4814
Joined: Sun Feb 17, 2013 3:06 pm
Location: Concrete, WA ICAO - 3W5

Re: What it takes to make an Arduino Flight Sim Controller

Postby OldAirmail » Sat Aug 20, 2016 3:25 pm

Parts order - update

The order that I placed on Sunday night was shipped the next day via the US postal Service. Normally the USPS takes it's own slow time in getting here, but the package was here on Wednesday, one day ahead of schedule.


The main item that I wanted was a little bit of a disappointment, but also somewhat interesting.

I'd ordered the unit as parts, i.e. not soldered. I'd suggest getting it soldered if you eyesight is less than you think it is. Soldering is easy to learn and I used to do a fair amount, but I think that I need stronger magnifying glasses. Don't know when that happened. :confusion-shrug:

Anyway. The dual rotary encoder, and the knobs, were smaller than I would have hoped, Actually, they're the same diameter as the one on the Desktop Aviator GPS that I have, I just wanted larger ones. The only clue to the size would have been the shaft diameters - 3.5mm & 5mm.

Still, it does work as advertised. After soldering the encoder and pins to the board I've been building Arduino breadboards to test it with for half the day. Well, that and playing with the six digit, 7 segment, numeric display. But more on that later.


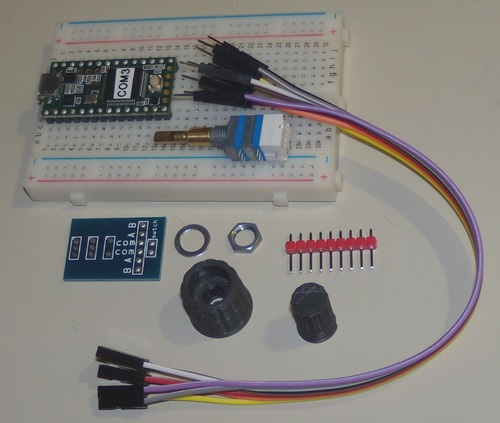
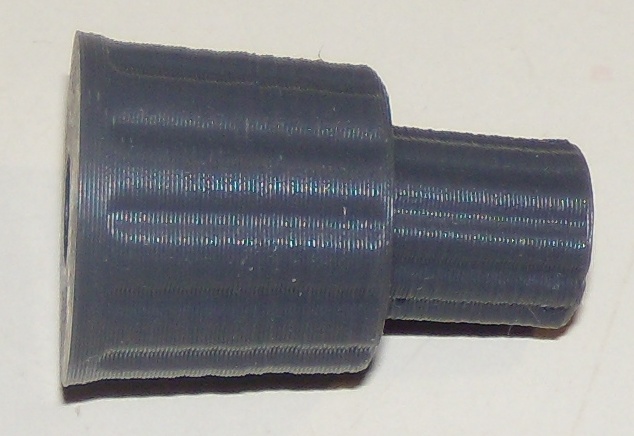
This (minus the Teensy & small breadboard) is what I received, and as I said, I ordered it as parts. If anyone is interested, there's no extra charge to have it shipped soldered together. The knobs are 3D printed. Unfortunately, they're also loose fitting. That's easy to fix though.

Image Image

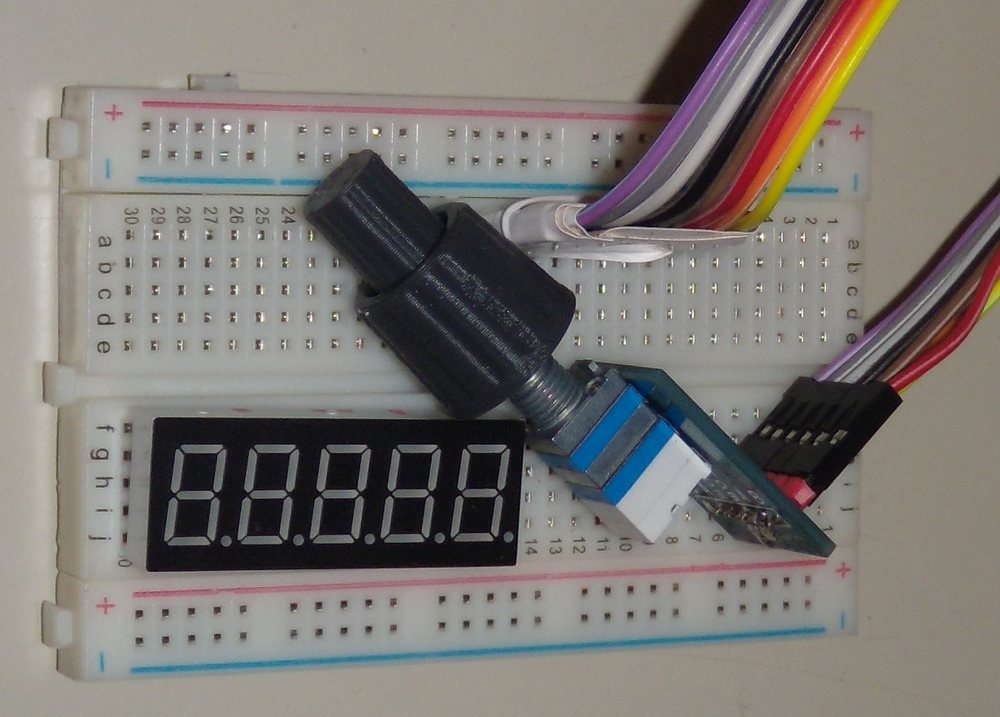
All together.
Image


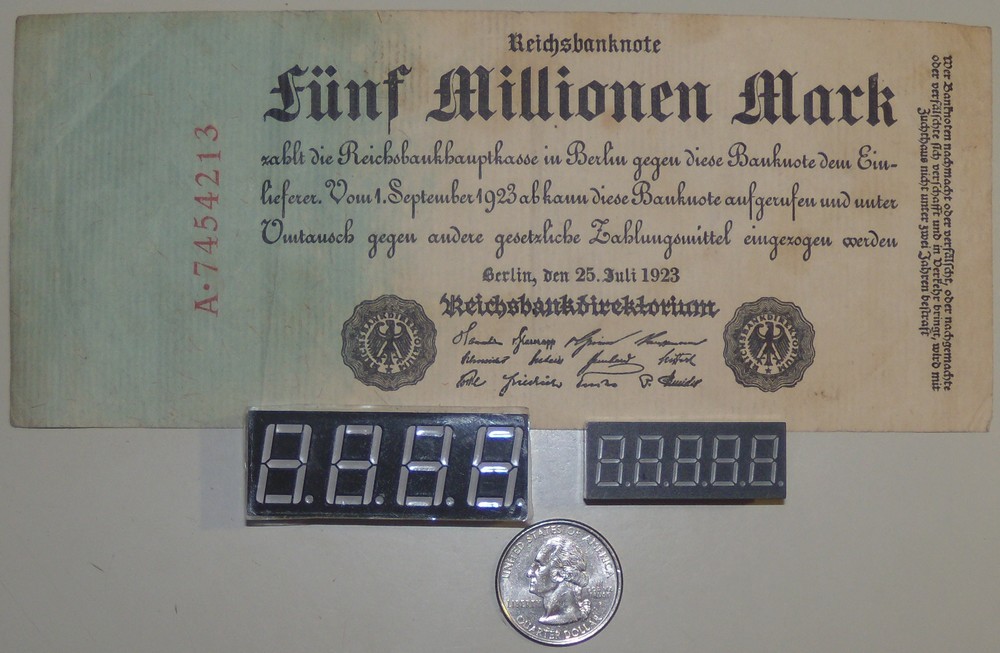
That five digit numeric display, above & below, is absolutely the perfect size to display AGL height. The larger one in the picture below, even if it were five digit, would be too large for what I have in mind.

Size comparison.
Image
All in all, I've saved some money and I'm very satisfied


Buying an Arduino kit is the perfect way to get most of the parts that you'll need to build something worthwhile, but it's no fun looking through a box of mixed up parts.

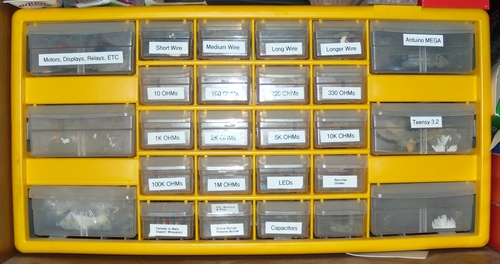
To keep things manageable, I've sorted everything (so far) into marked drawers.
Image


I have a very good multimeter at work, but all I have at home is an old, and very cheap, analog meter. That's the kind with the needle. What I wanted was a relatively good, and very cheap, digital multimeter for these projects.

I found one on Amazon that fulfills all my home needs, aside from not having alligator clips (which I can add later) for only $16.

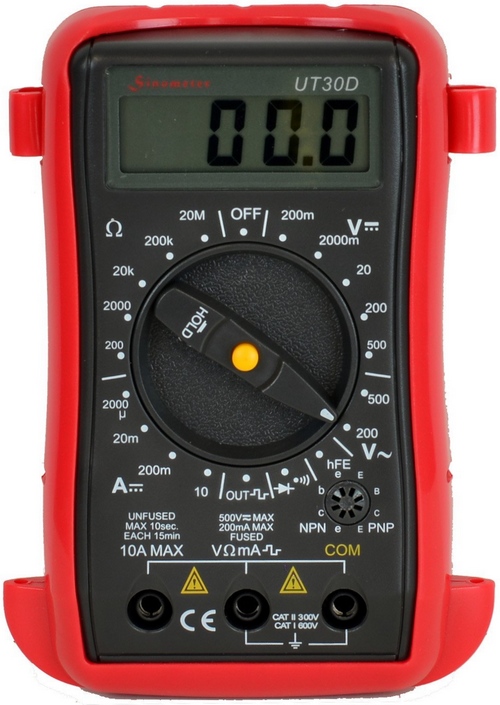
Uni-T UT30D Pocket-size Digital Multimeter with Square Wave Generator (50Hz),Sinometer OEM

Image
.. .
Get the most out of your controls - SPAD.neXt

Image
. . . . . .Any time, any plane, any weather.
. . . . . . . . . . . . . Prepar3d V4
User avatar
OldAirmail
Major
Major
 
Posts: 4814
Joined: Sun Feb 17, 2013 3:06 pm
Location: Concrete, WA ICAO - 3W5

Re: What it takes to make an Arduino Flight Sim Controller

Postby OldAirmail » Sun Aug 21, 2016 1:58 pm

Just a quick update on the multimeter above.

While having a multimeter that comes with alligator clips is very desirable, there are ways of getting around this problem.

Alligator clips can cost very little and give you the ability to basically do the impossible - use three or four hands at once.

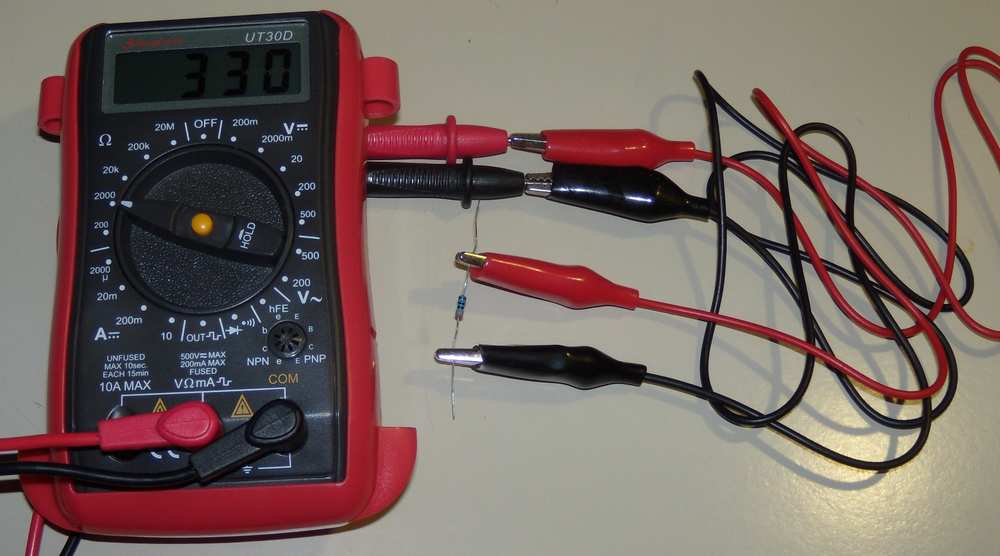
I new that I had a alligator jumper set that I rarely use laying about.

Found them!

Clamped on a resistor for measurement.
Image
.. .
Get the most out of your controls - SPAD.neXt

Image
. . . . . .Any time, any plane, any weather.
. . . . . . . . . . . . . Prepar3d V4
User avatar
OldAirmail
Major
Major
 
Posts: 4814
Joined: Sun Feb 17, 2013 3:06 pm
Location: Concrete, WA ICAO - 3W5

Re: What it takes to make an Arduino Flight Sim Controller

Postby OldAirmail » Tue Aug 23, 2016 9:38 pm

Flaps


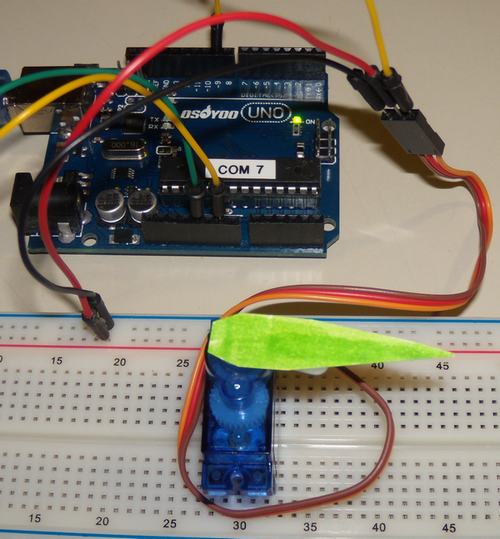
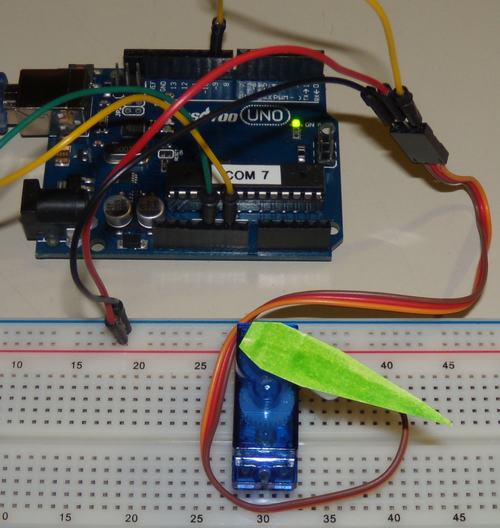
I'm playing around with flaps indicators. At first I thought that I'd like LEDs to light up for each stage.

But then I started playing around with a servomotor. The more I watched it move, the more my brain started working. :idea:

Servomotors are what RC cars and planes use to tell them what direction to go, etc.

At it's simplest, the Arduino board tells the motor how much you want it to turn, and you can control how fast it'll turn.


Food for thought - sometimes it's the simple things that can make you smile - how about a real-time flap indicator?
Image . . Image

Controlling a servomotor is fairly simple, tying it into FS9/FSX/P3d is not a major problem. The more you learn, the easier it becomes.


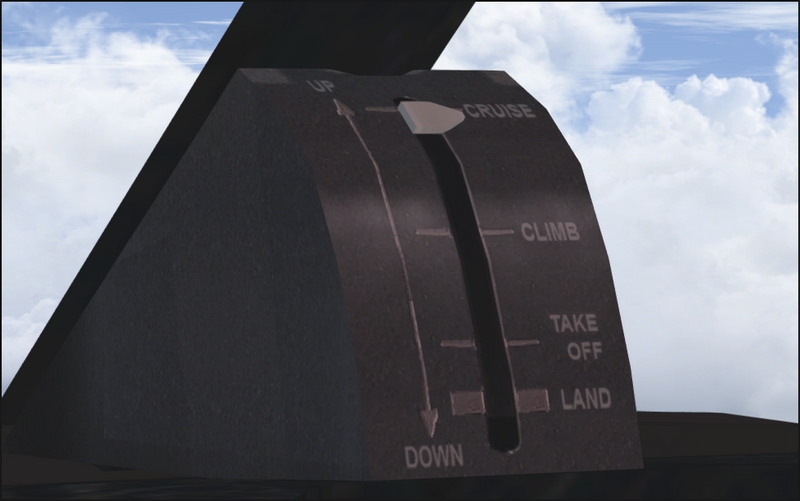
This flaps indicator from my DeHavilland DHC-3 Otter X wouldn't be any harder to make.
Image


Remember, you don't have to make a full cockpit. Just a few instruments can make flight sims more fun.
.. .
Get the most out of your controls - SPAD.neXt

Image
. . . . . .Any time, any plane, any weather.
. . . . . . . . . . . . . Prepar3d V4
User avatar
OldAirmail
Major
Major
 
Posts: 4814
Joined: Sun Feb 17, 2013 3:06 pm
Location: Concrete, WA ICAO - 3W5


Return to Hardware

Who is online

Users browsing this forum: No registered users and 347 guests